Step 1: Access Meta’s Application Panel
- Go to Meta for Developers
- Log in with your Facebook/Meta account

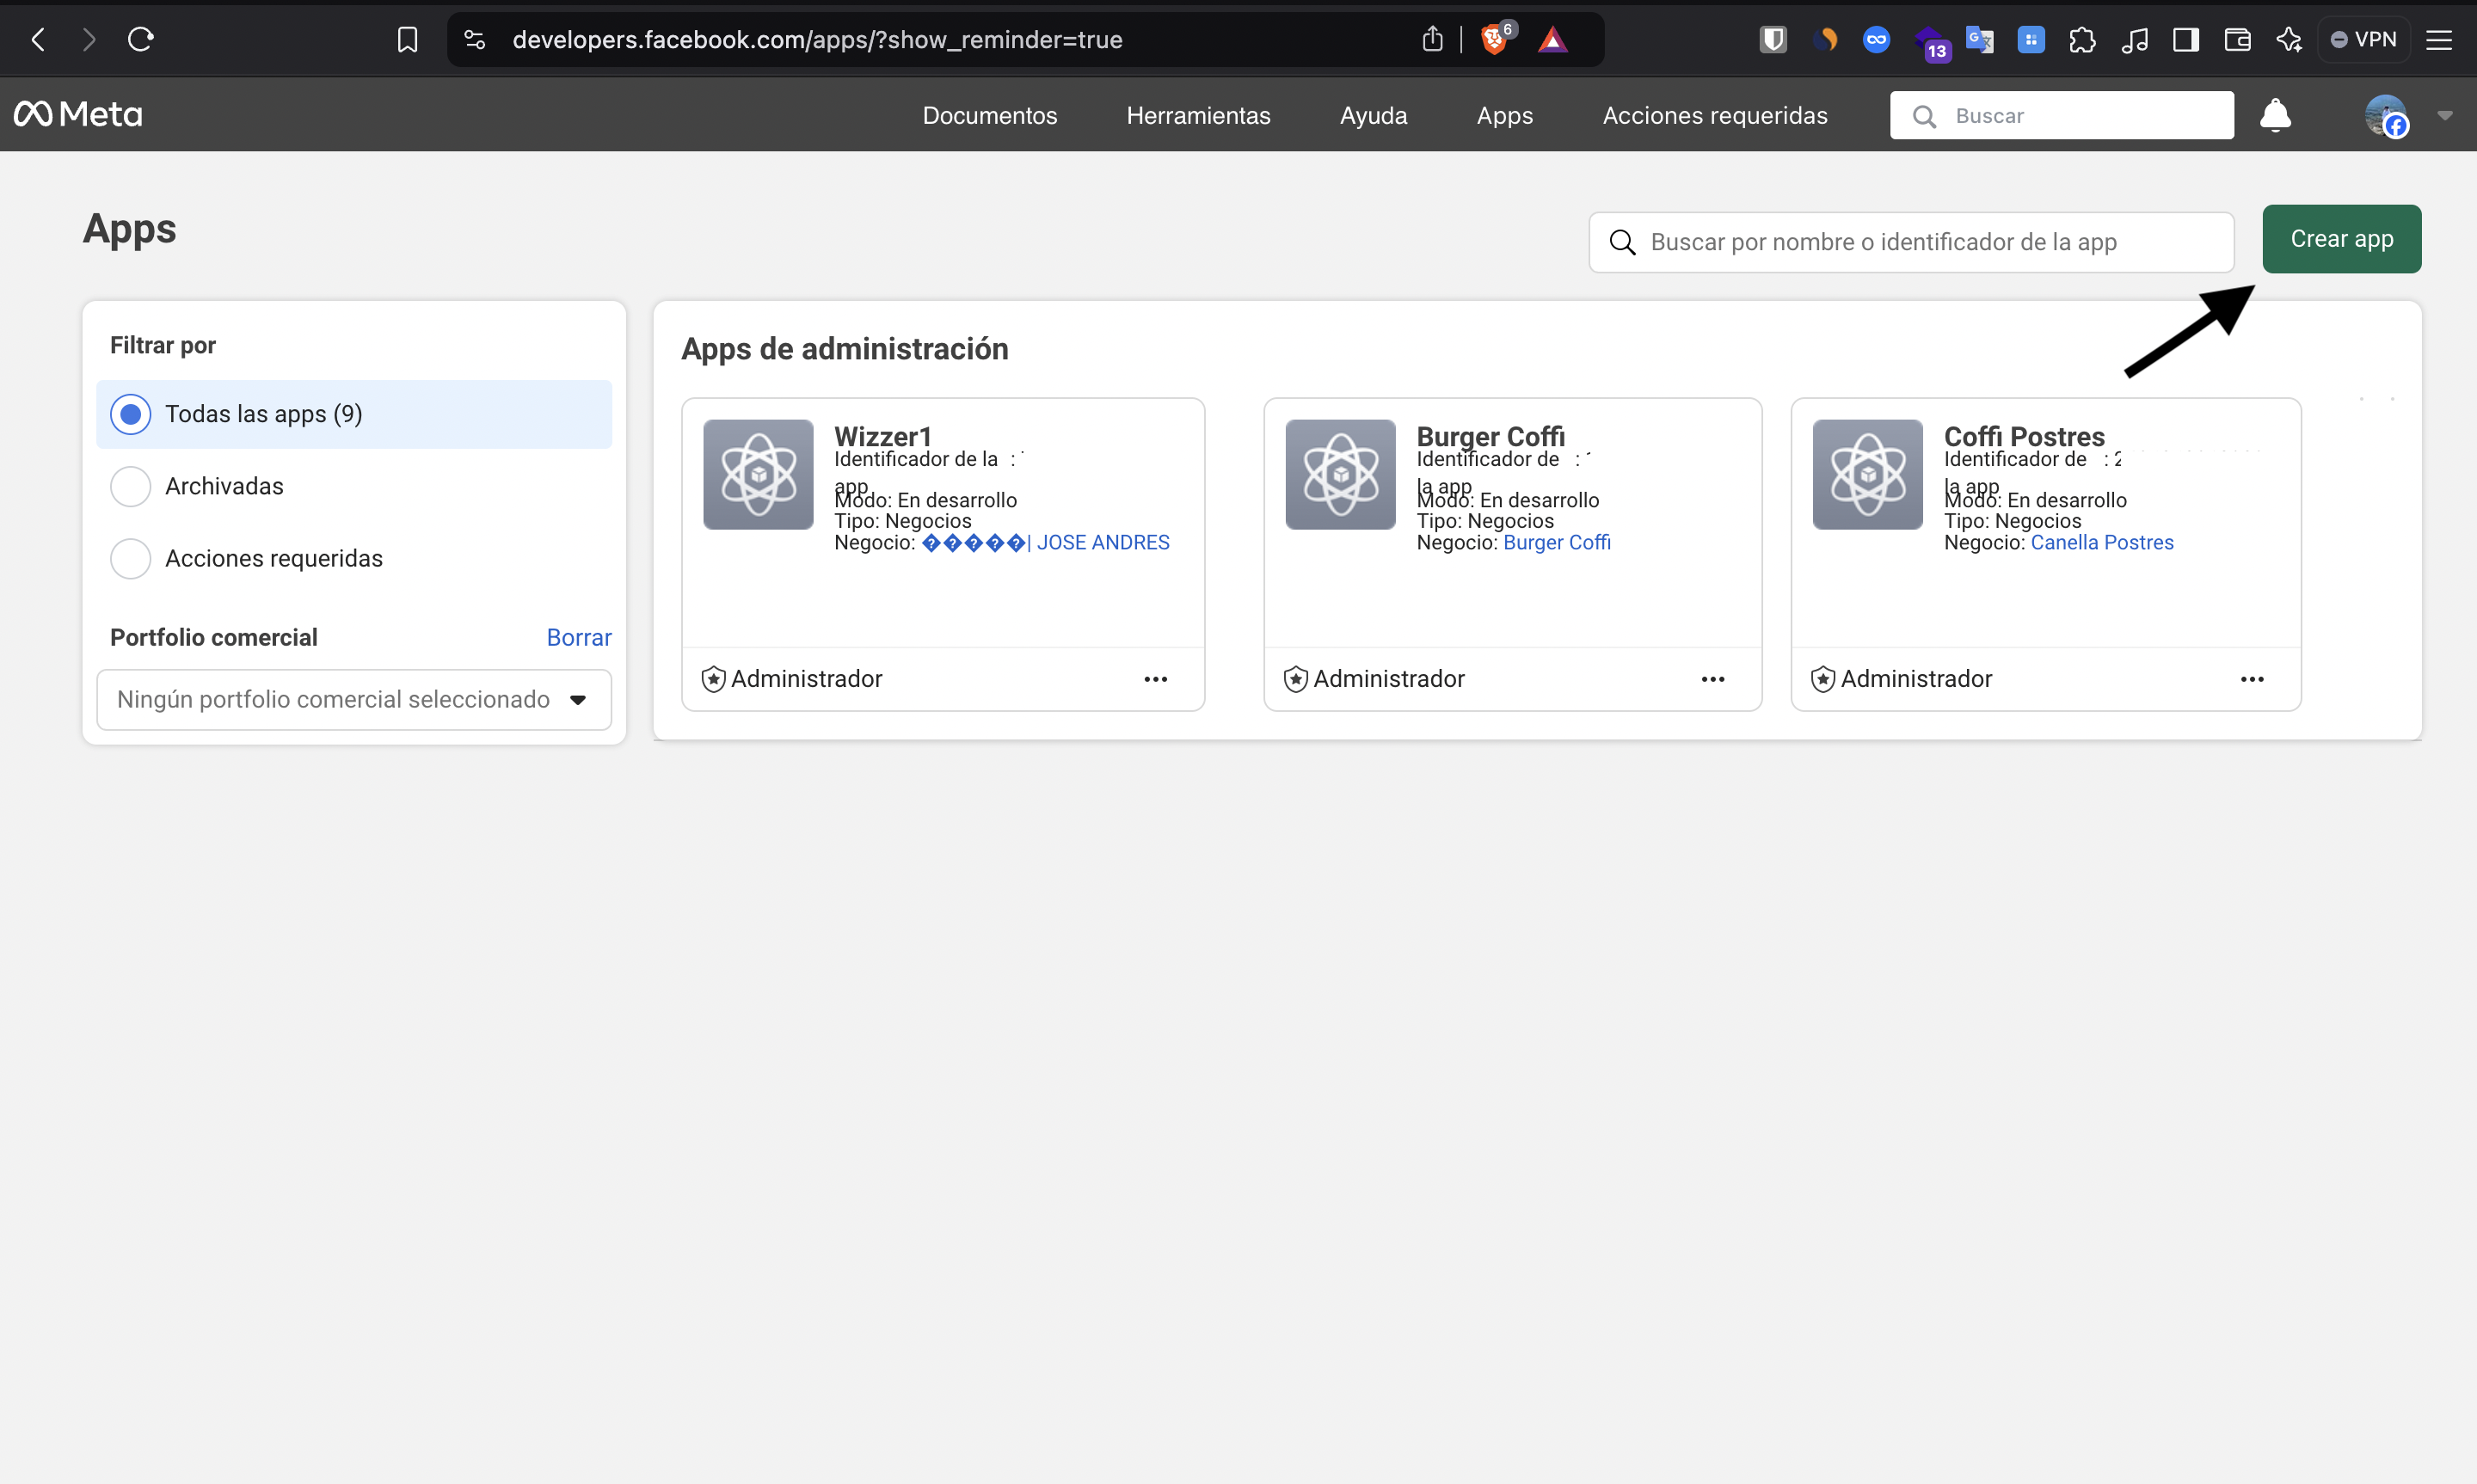
Step 2: Access the Apps Dashboard
- Once in Meta for Developers, access the Apps dashboard
- Click “Create App” in the top right corner
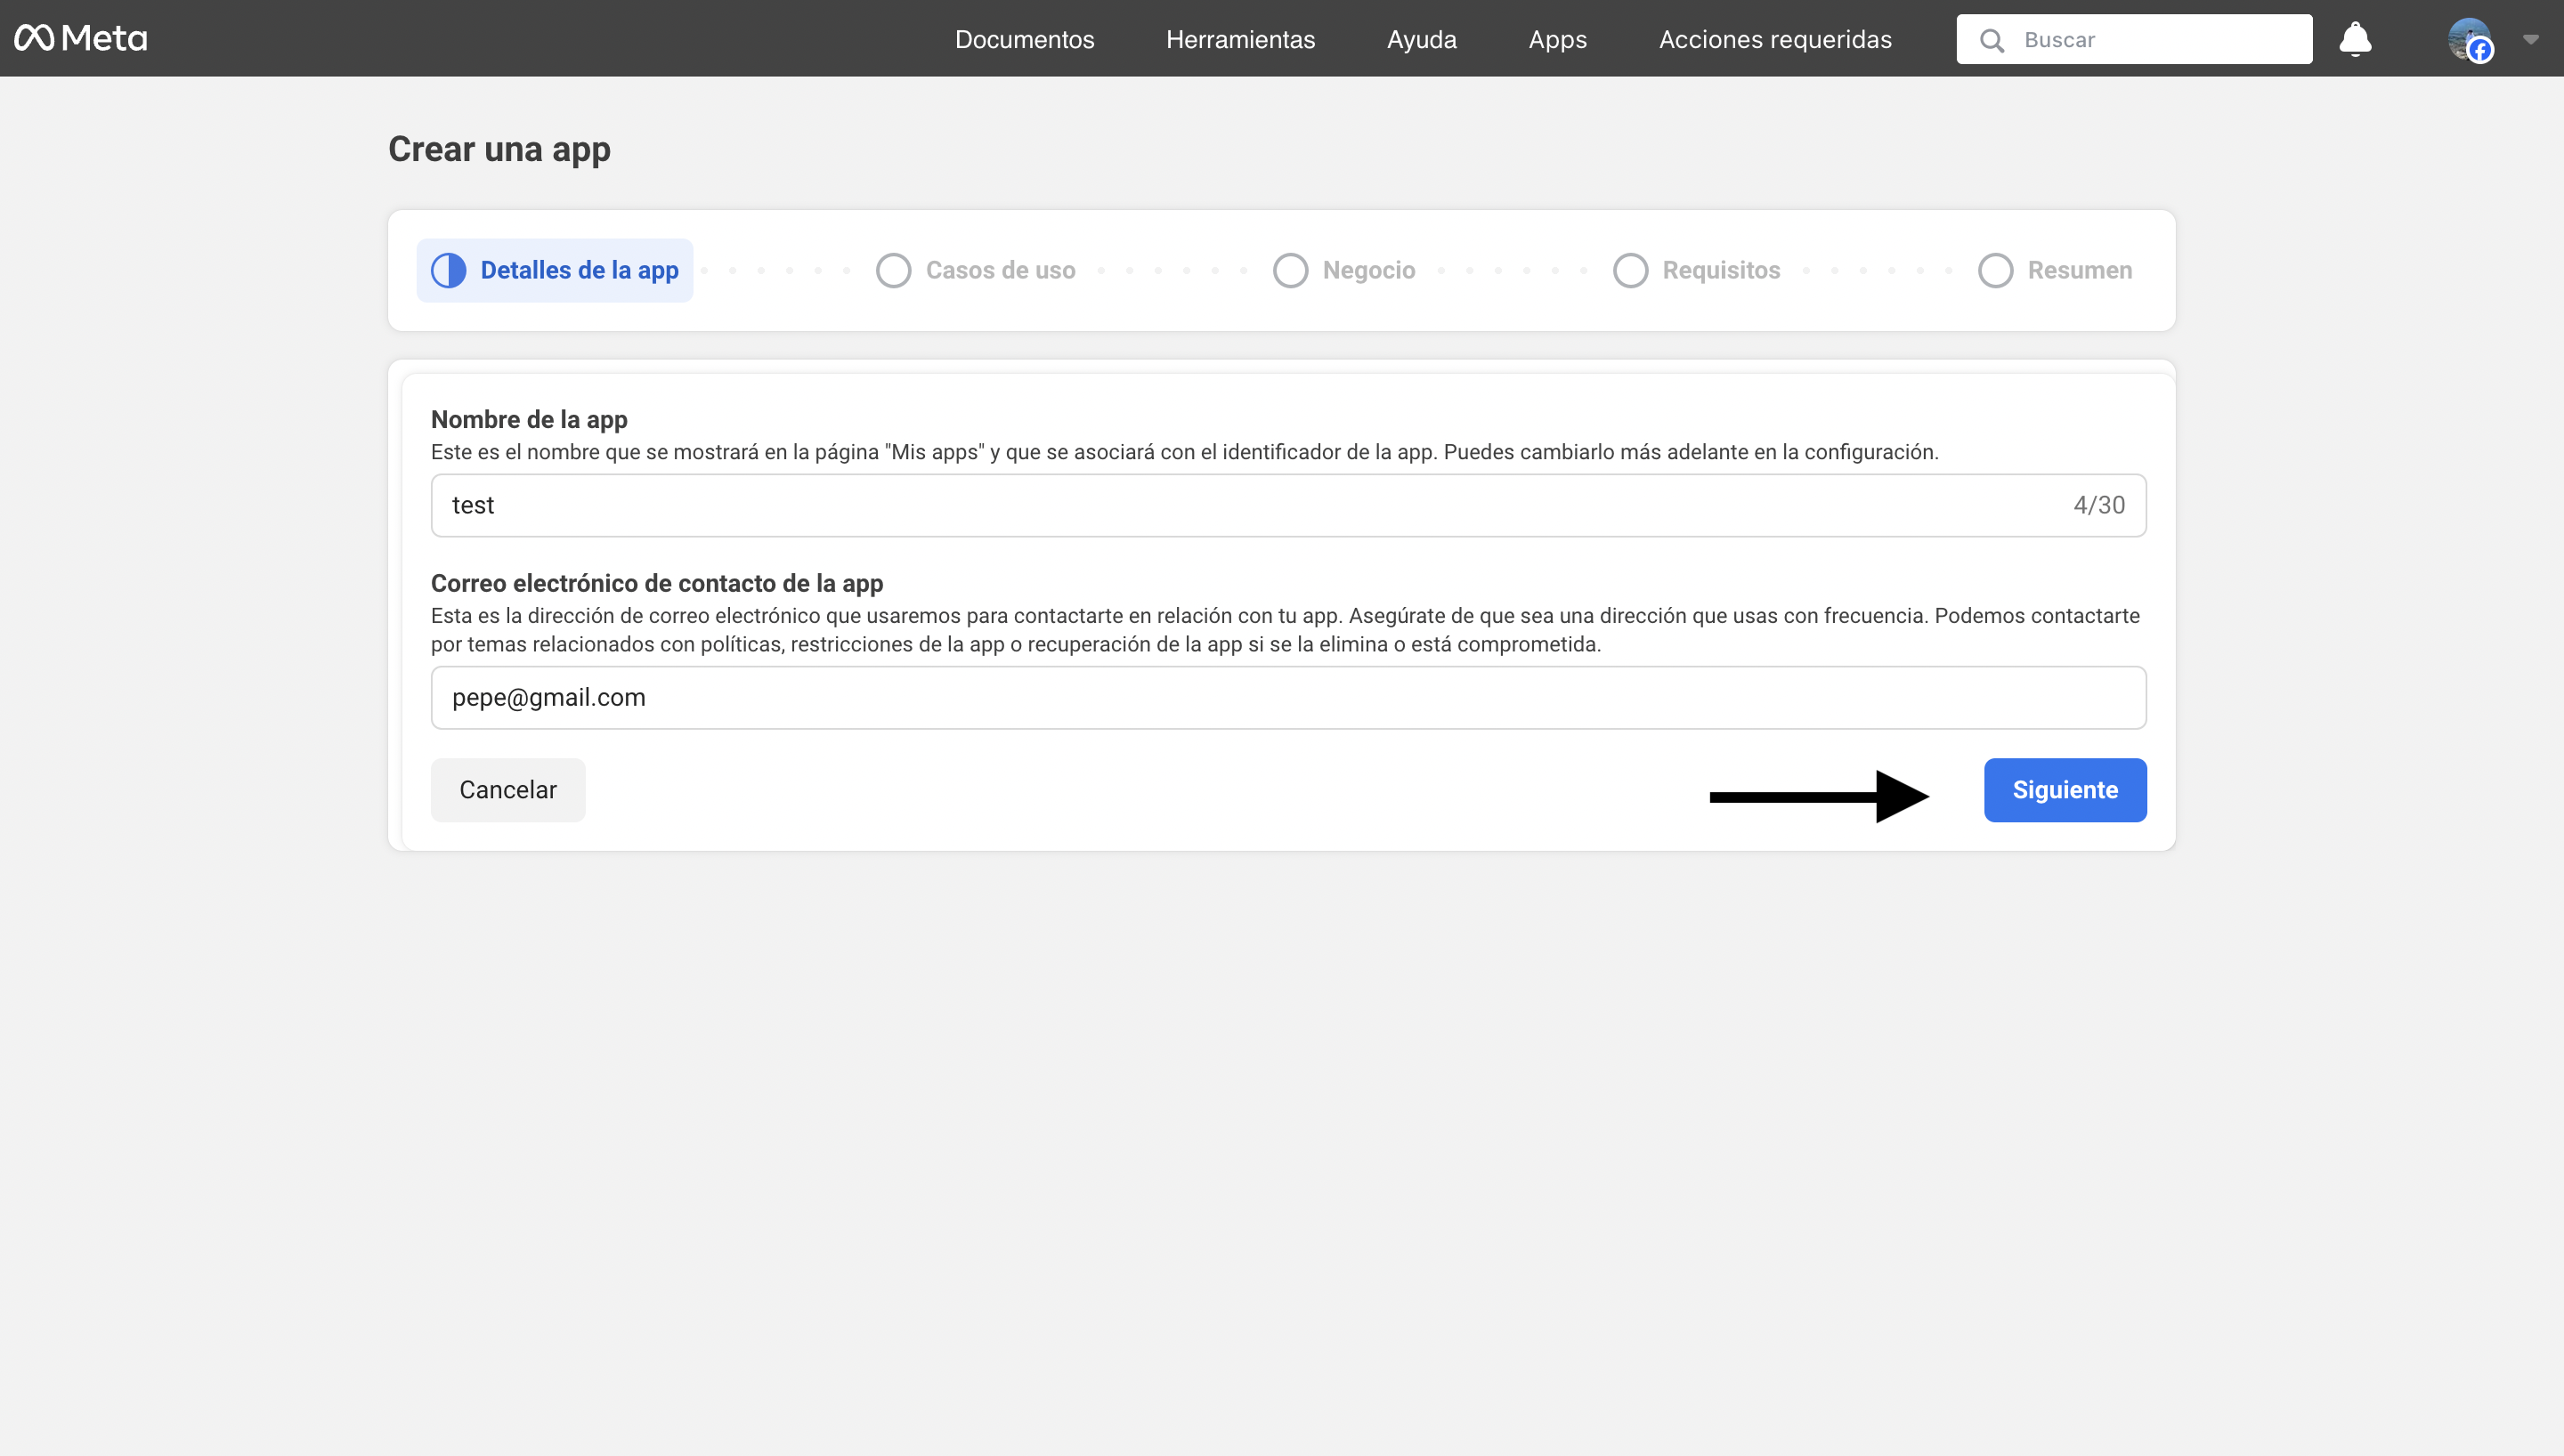
Step 3: Complete Application Details
- App name: Enter a descriptive name for your application
- Contact email: Provide a valid email for notifications
- Click “Next”
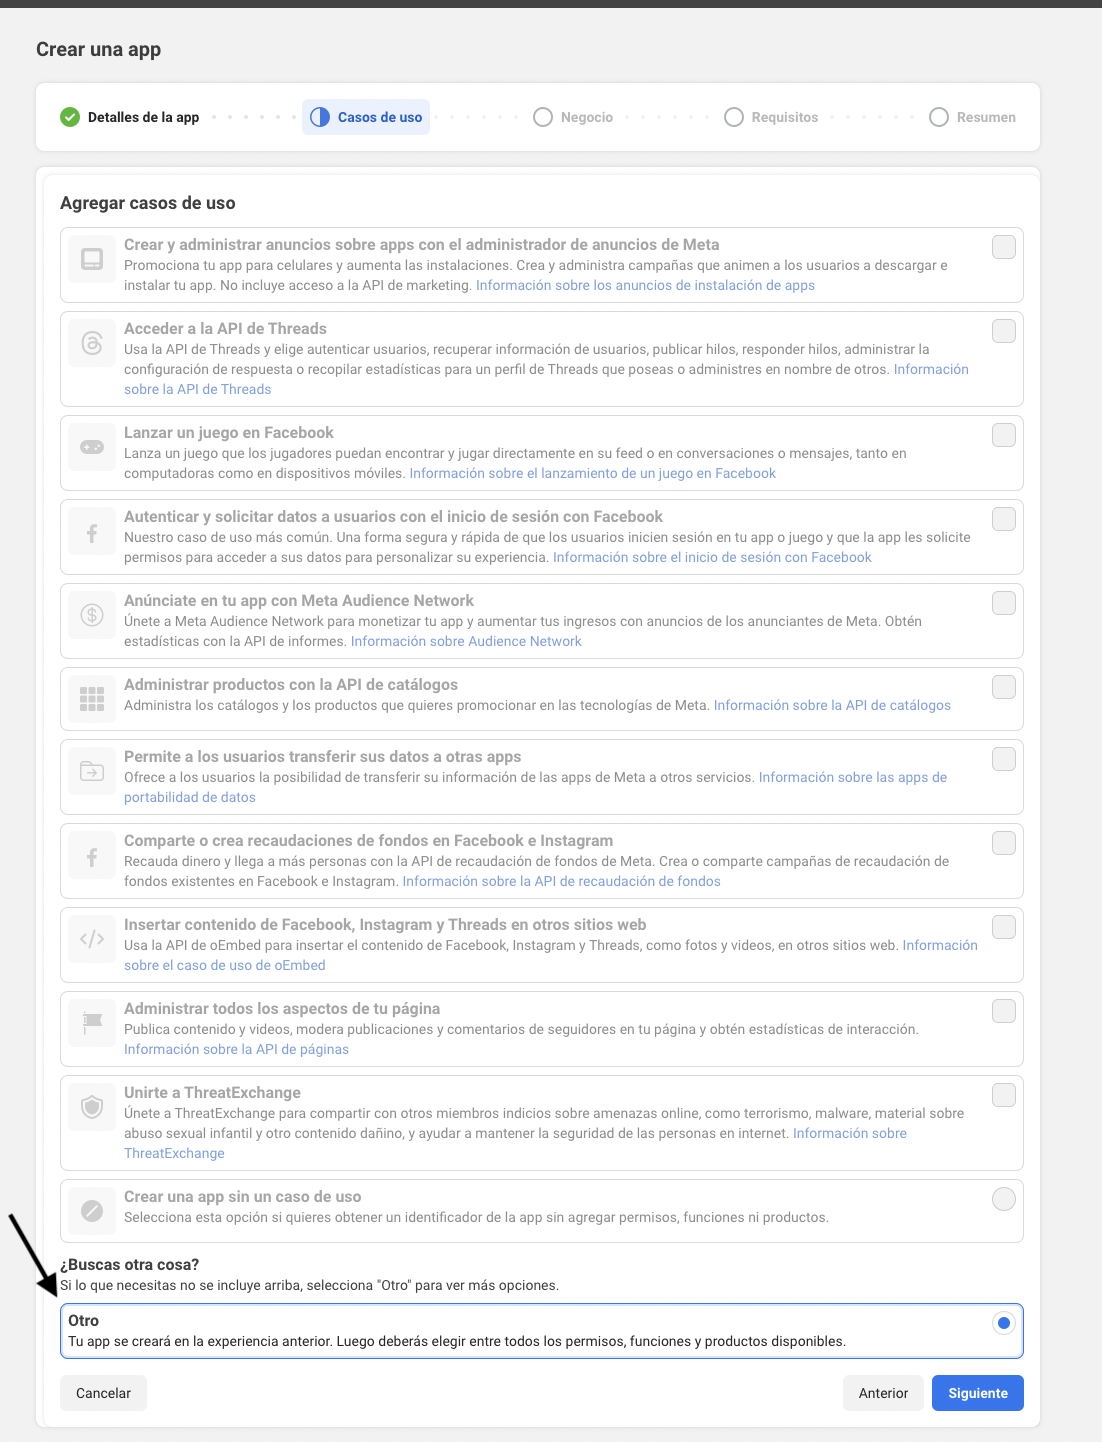
Step 4: Configure Use Cases
-
In the “Looking for something else?” section, select the “Other” option
- This will allow you to choose from all available permissions, functions, and products
- This is the recommended option for integrating WhatsApp Business API
- Click “Next”
Step 5: Select Application Type
- Select the “Business” application type
- This type allows you to manage business assets like WhatsApp, Messenger, and Instagram

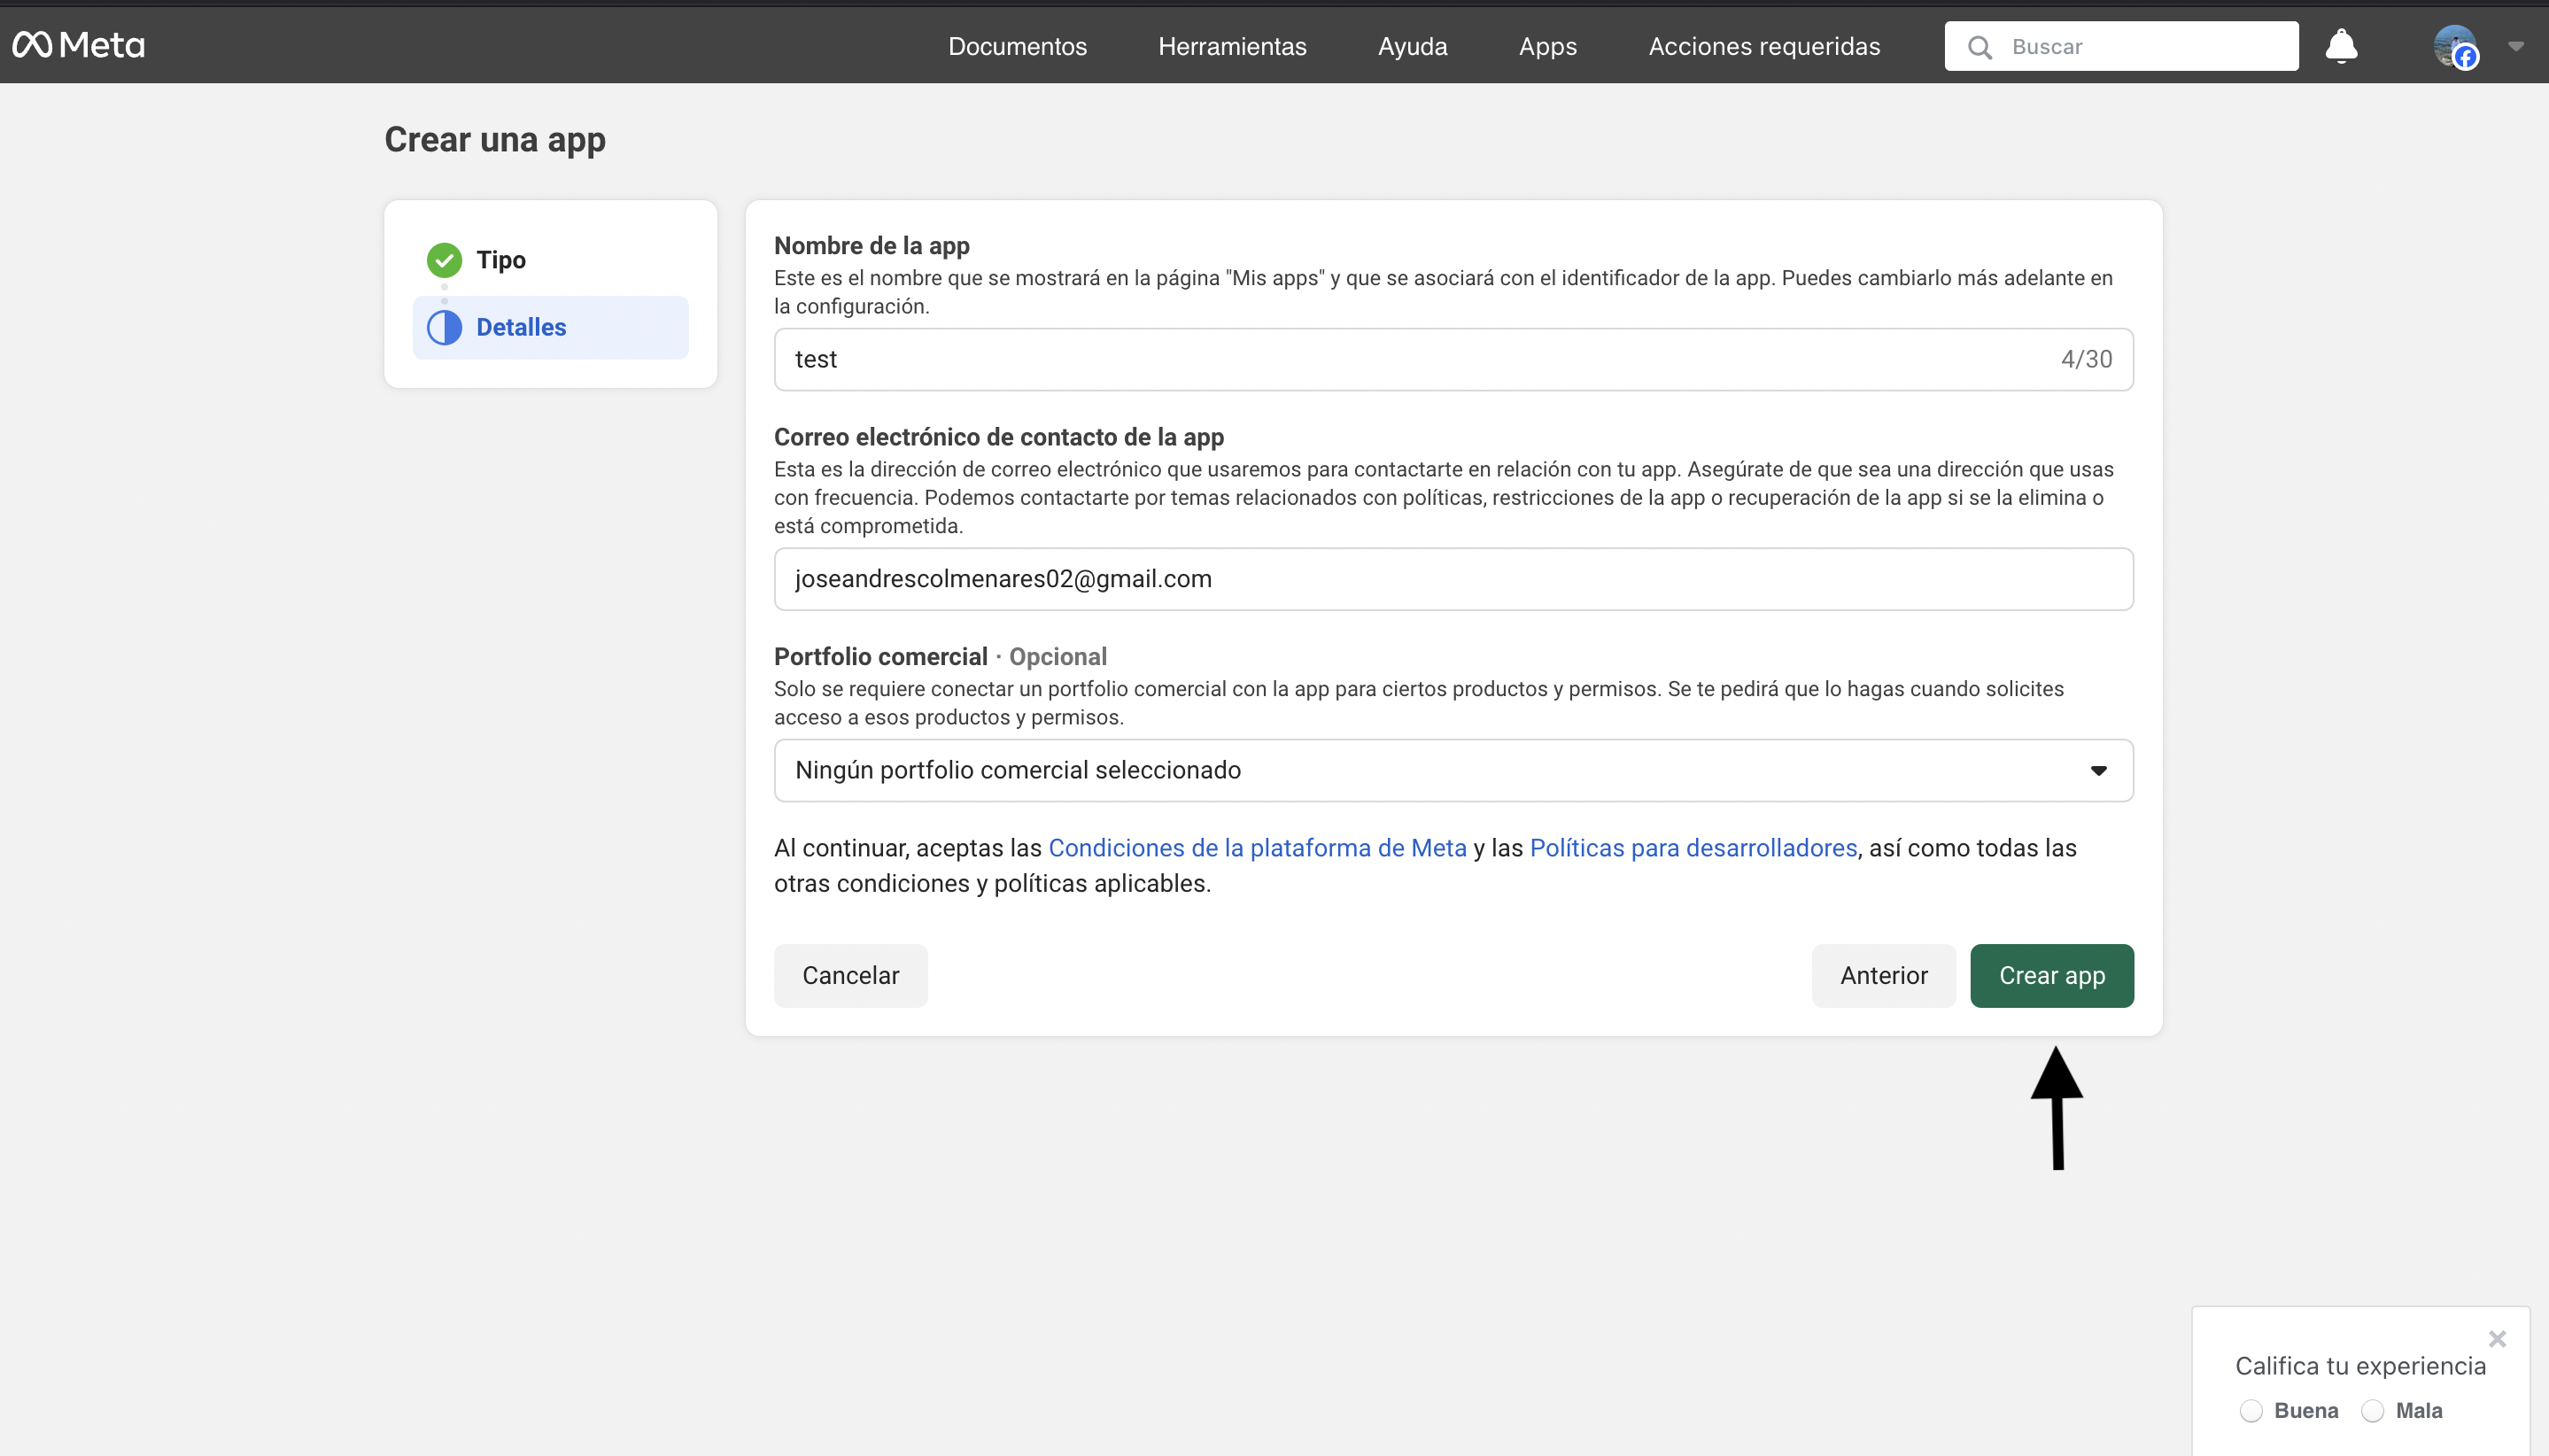
Step 6: Final Application Configuration
In this step you will complete the creation of your application:- Application name: Confirm or update your app name
- Email: Verify that the contact email is correct
- Business portfolio: Assign an existing business portfolio or create a new one
- Important: A business portfolio is required to obtain a permanent token
- If you don’t have one, you can create it during this process
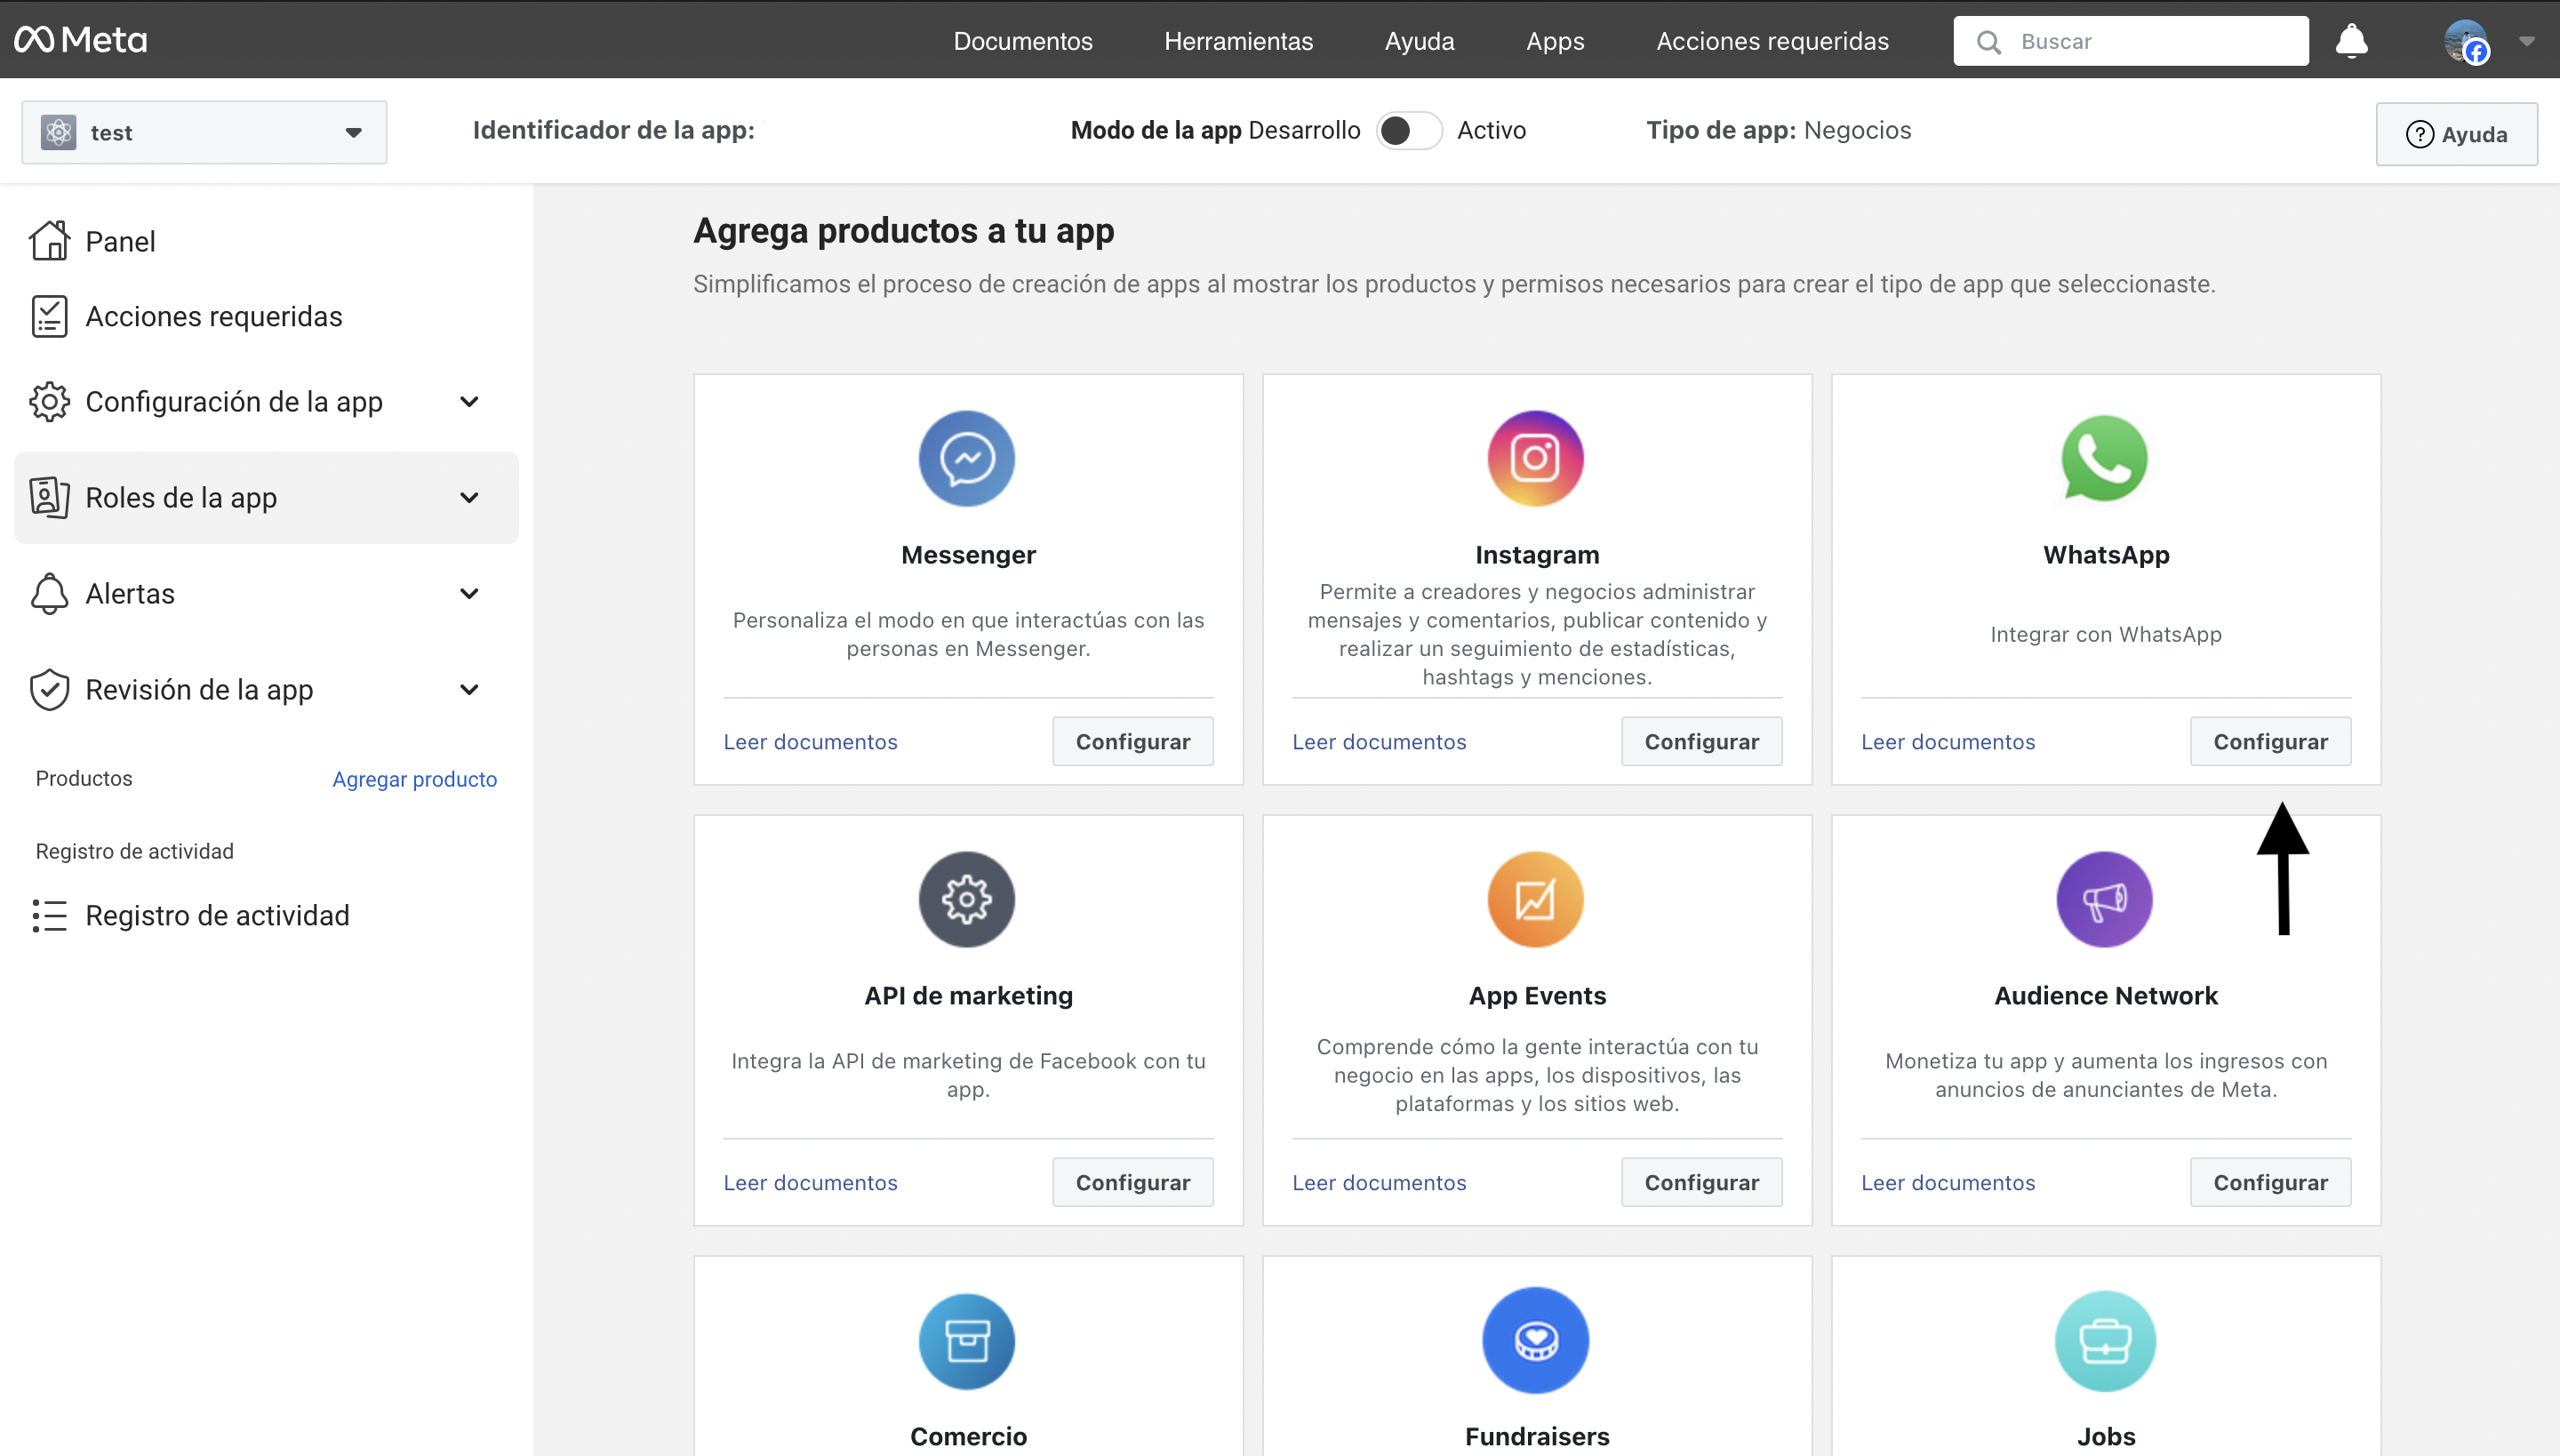
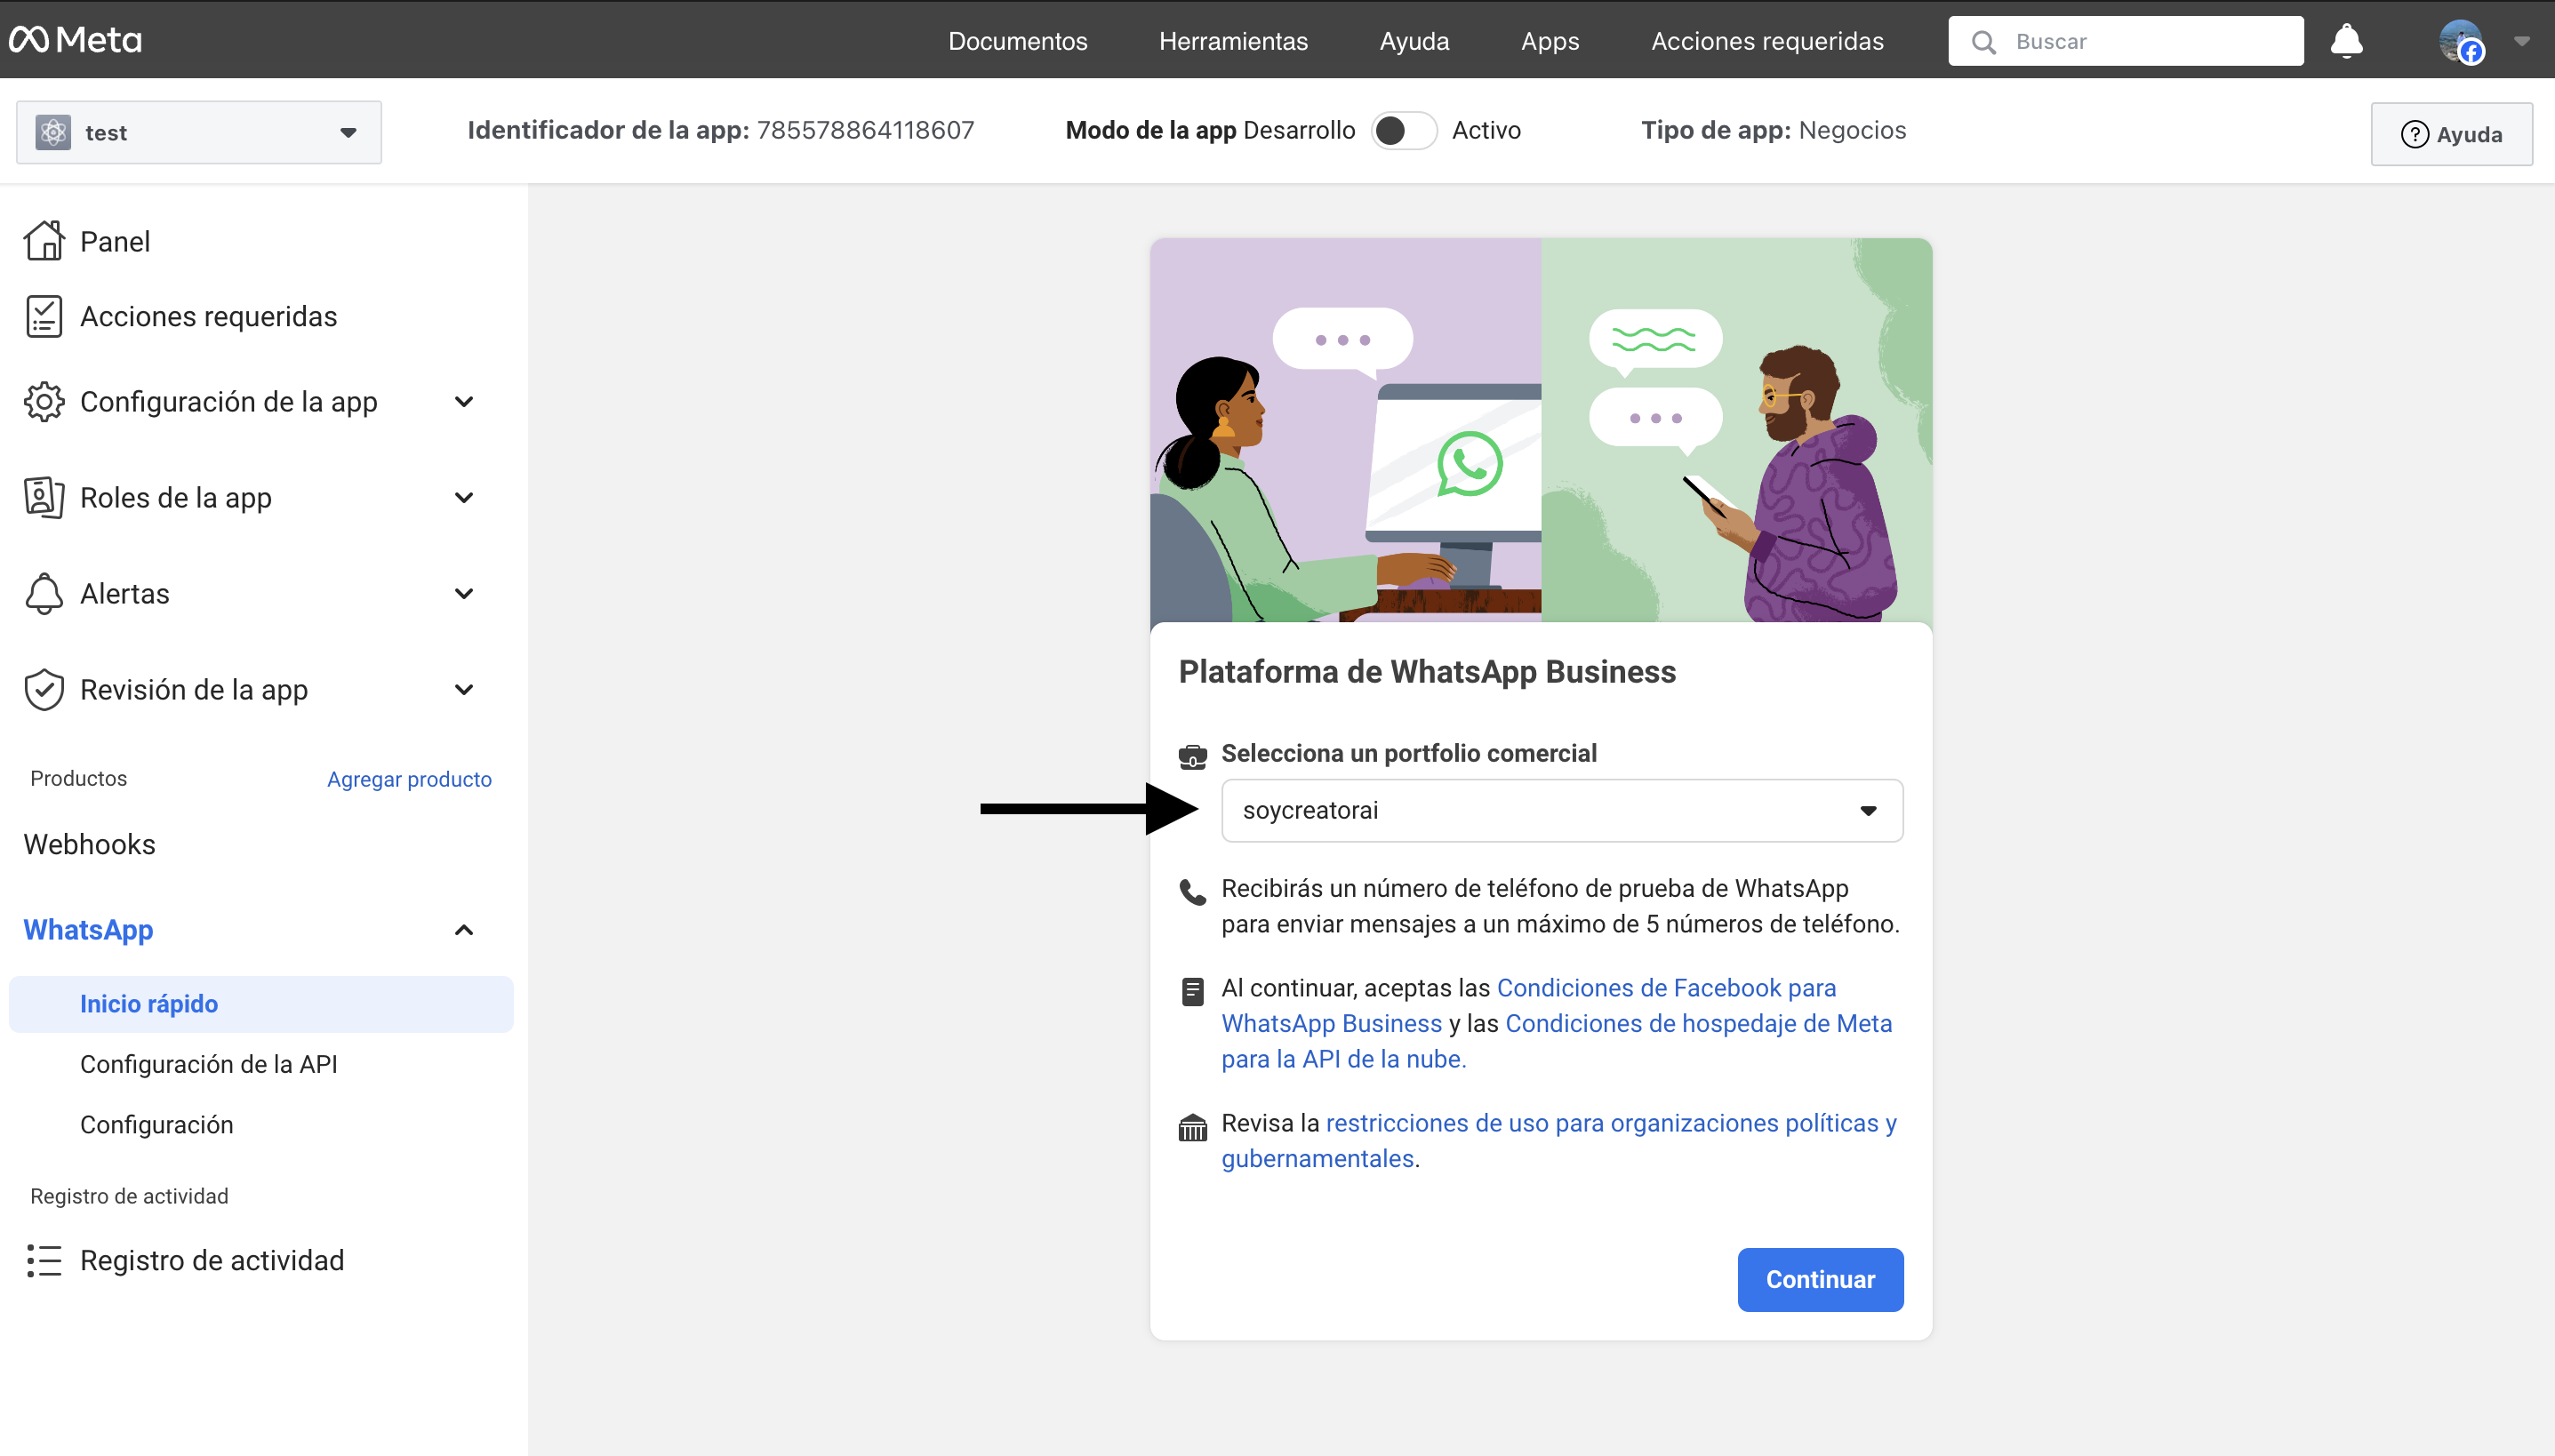
- Configure the WhatsApp product in your application
- Access the WhatsApp Business API configuration
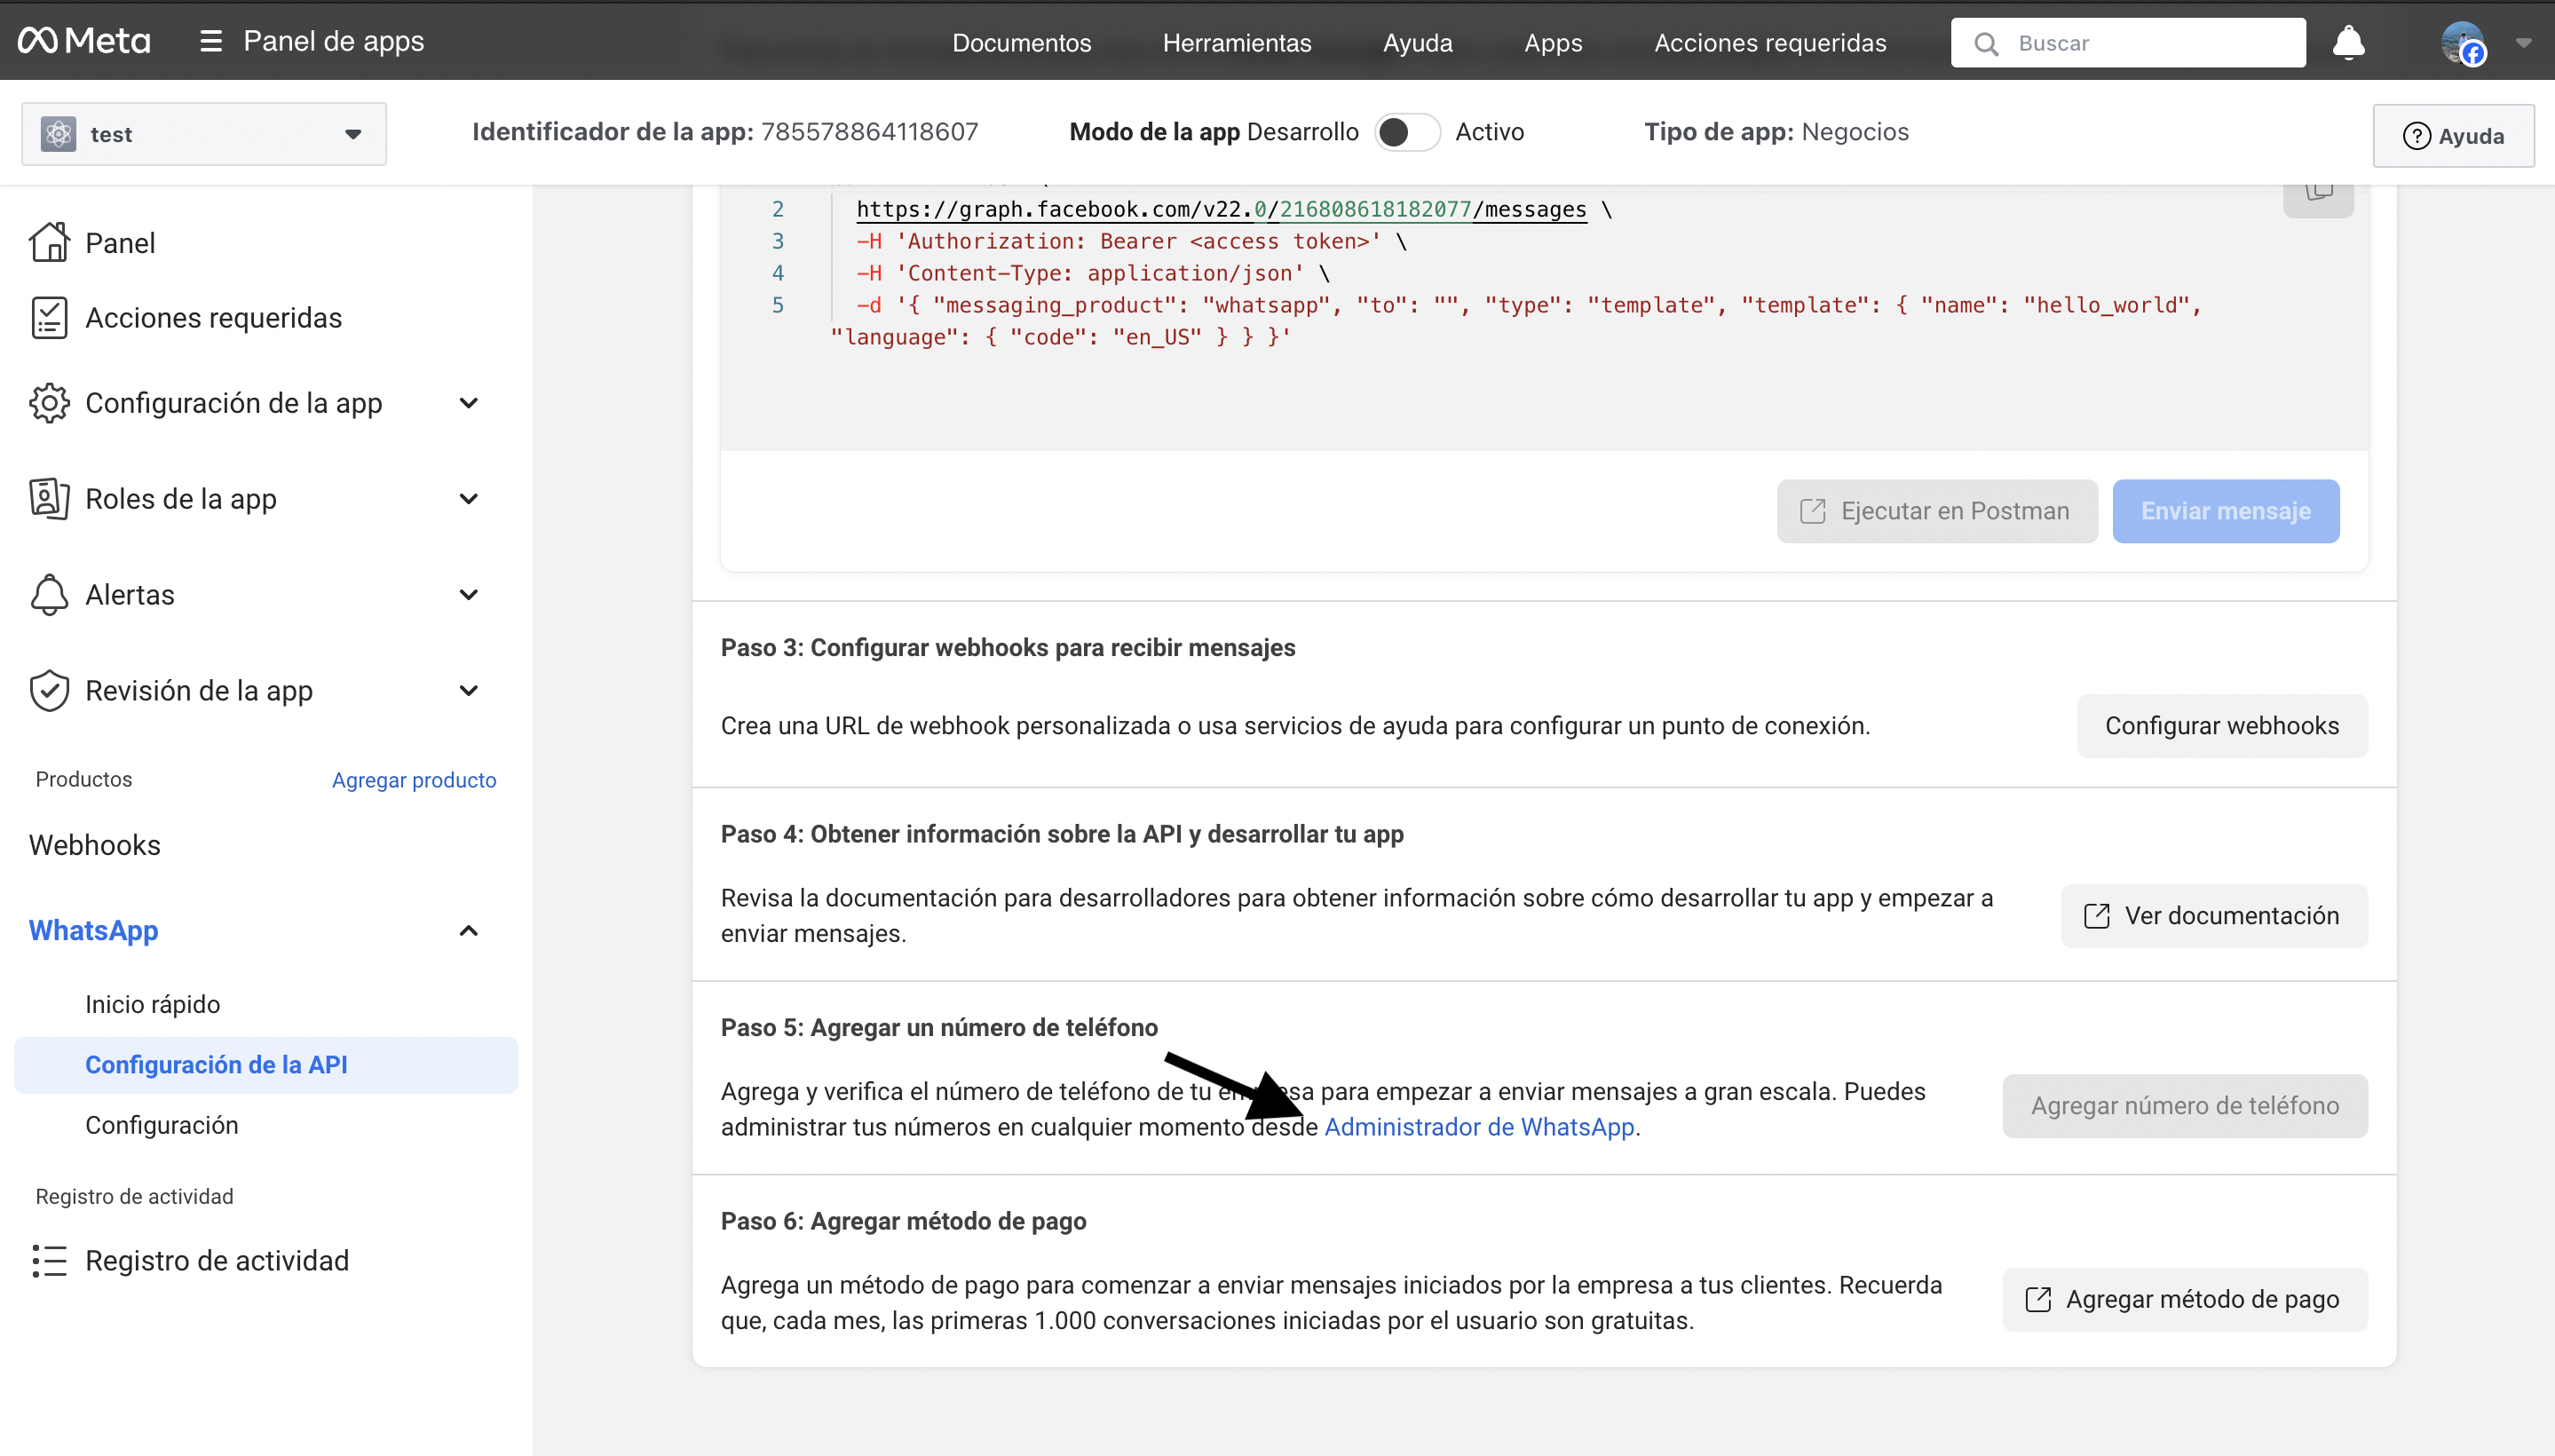
- Configure webhooks: Define the URL where you will receive notifications
- Add phone number: Register your business number
- Add payment method: Configure billing
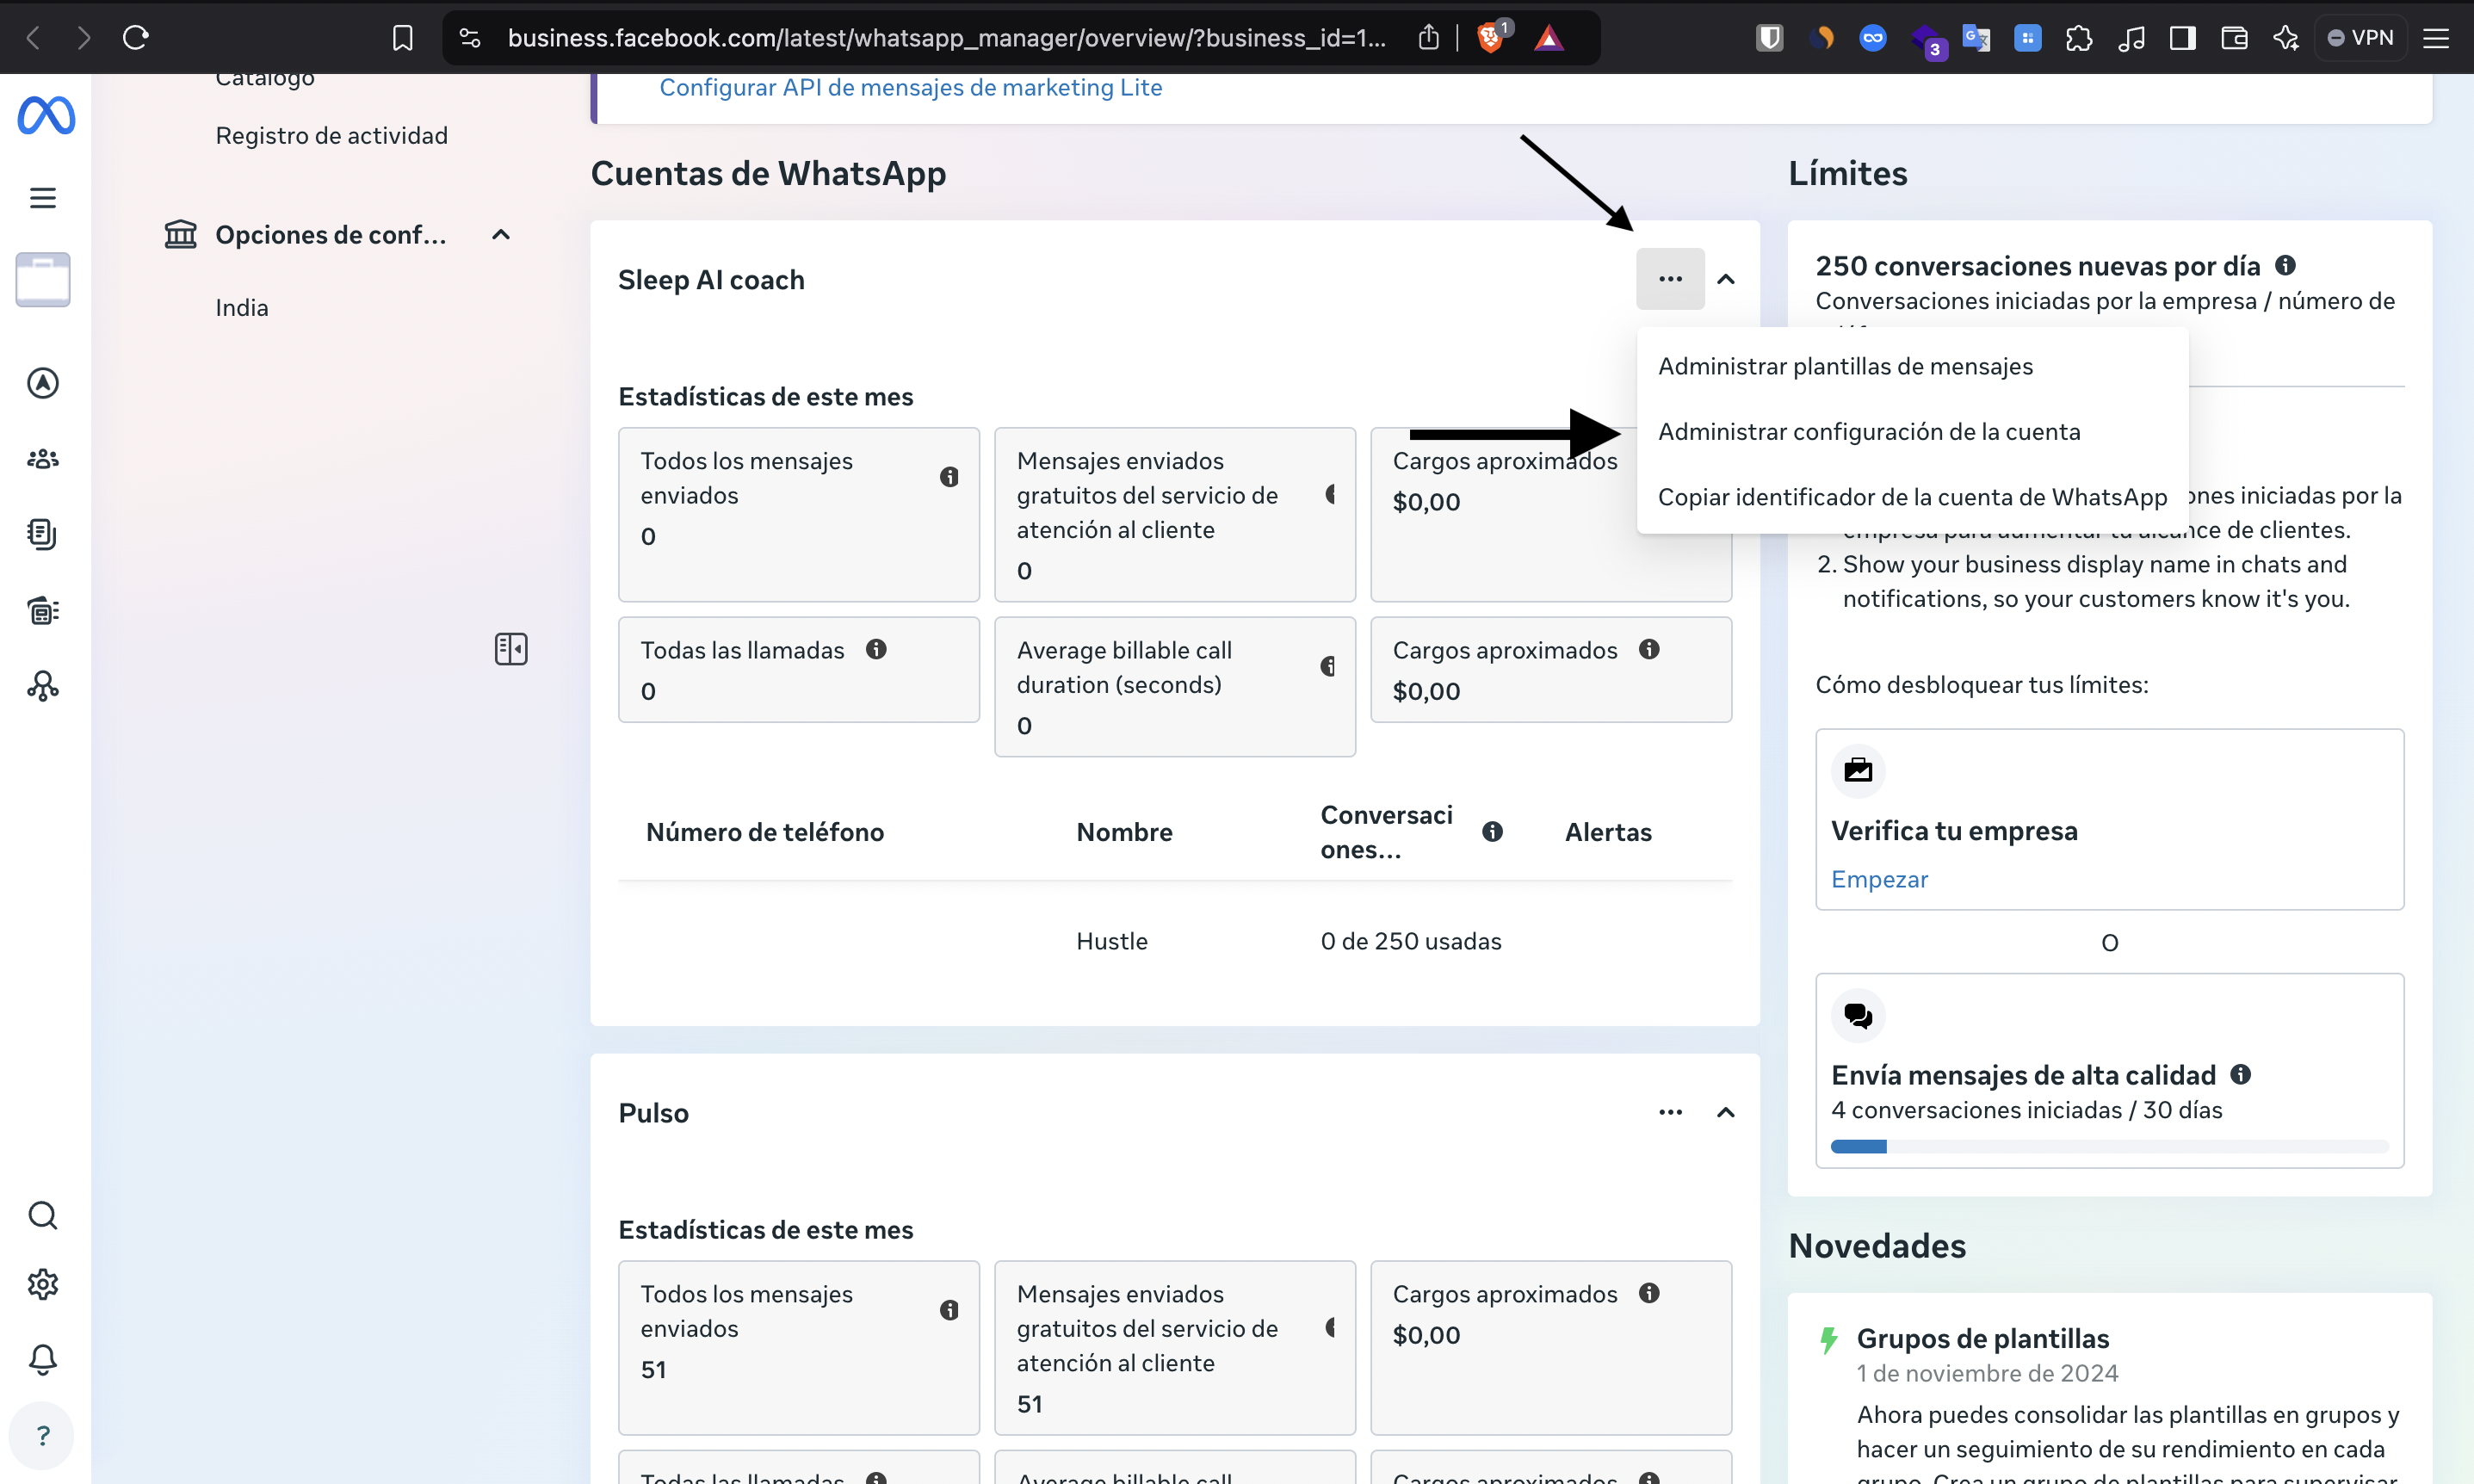
Step 7: Access API Configuration
- Go to API Configuration

- Go to WhatsApp Manager
- Click the three dots (options menu)
- Select “Manage account settings”
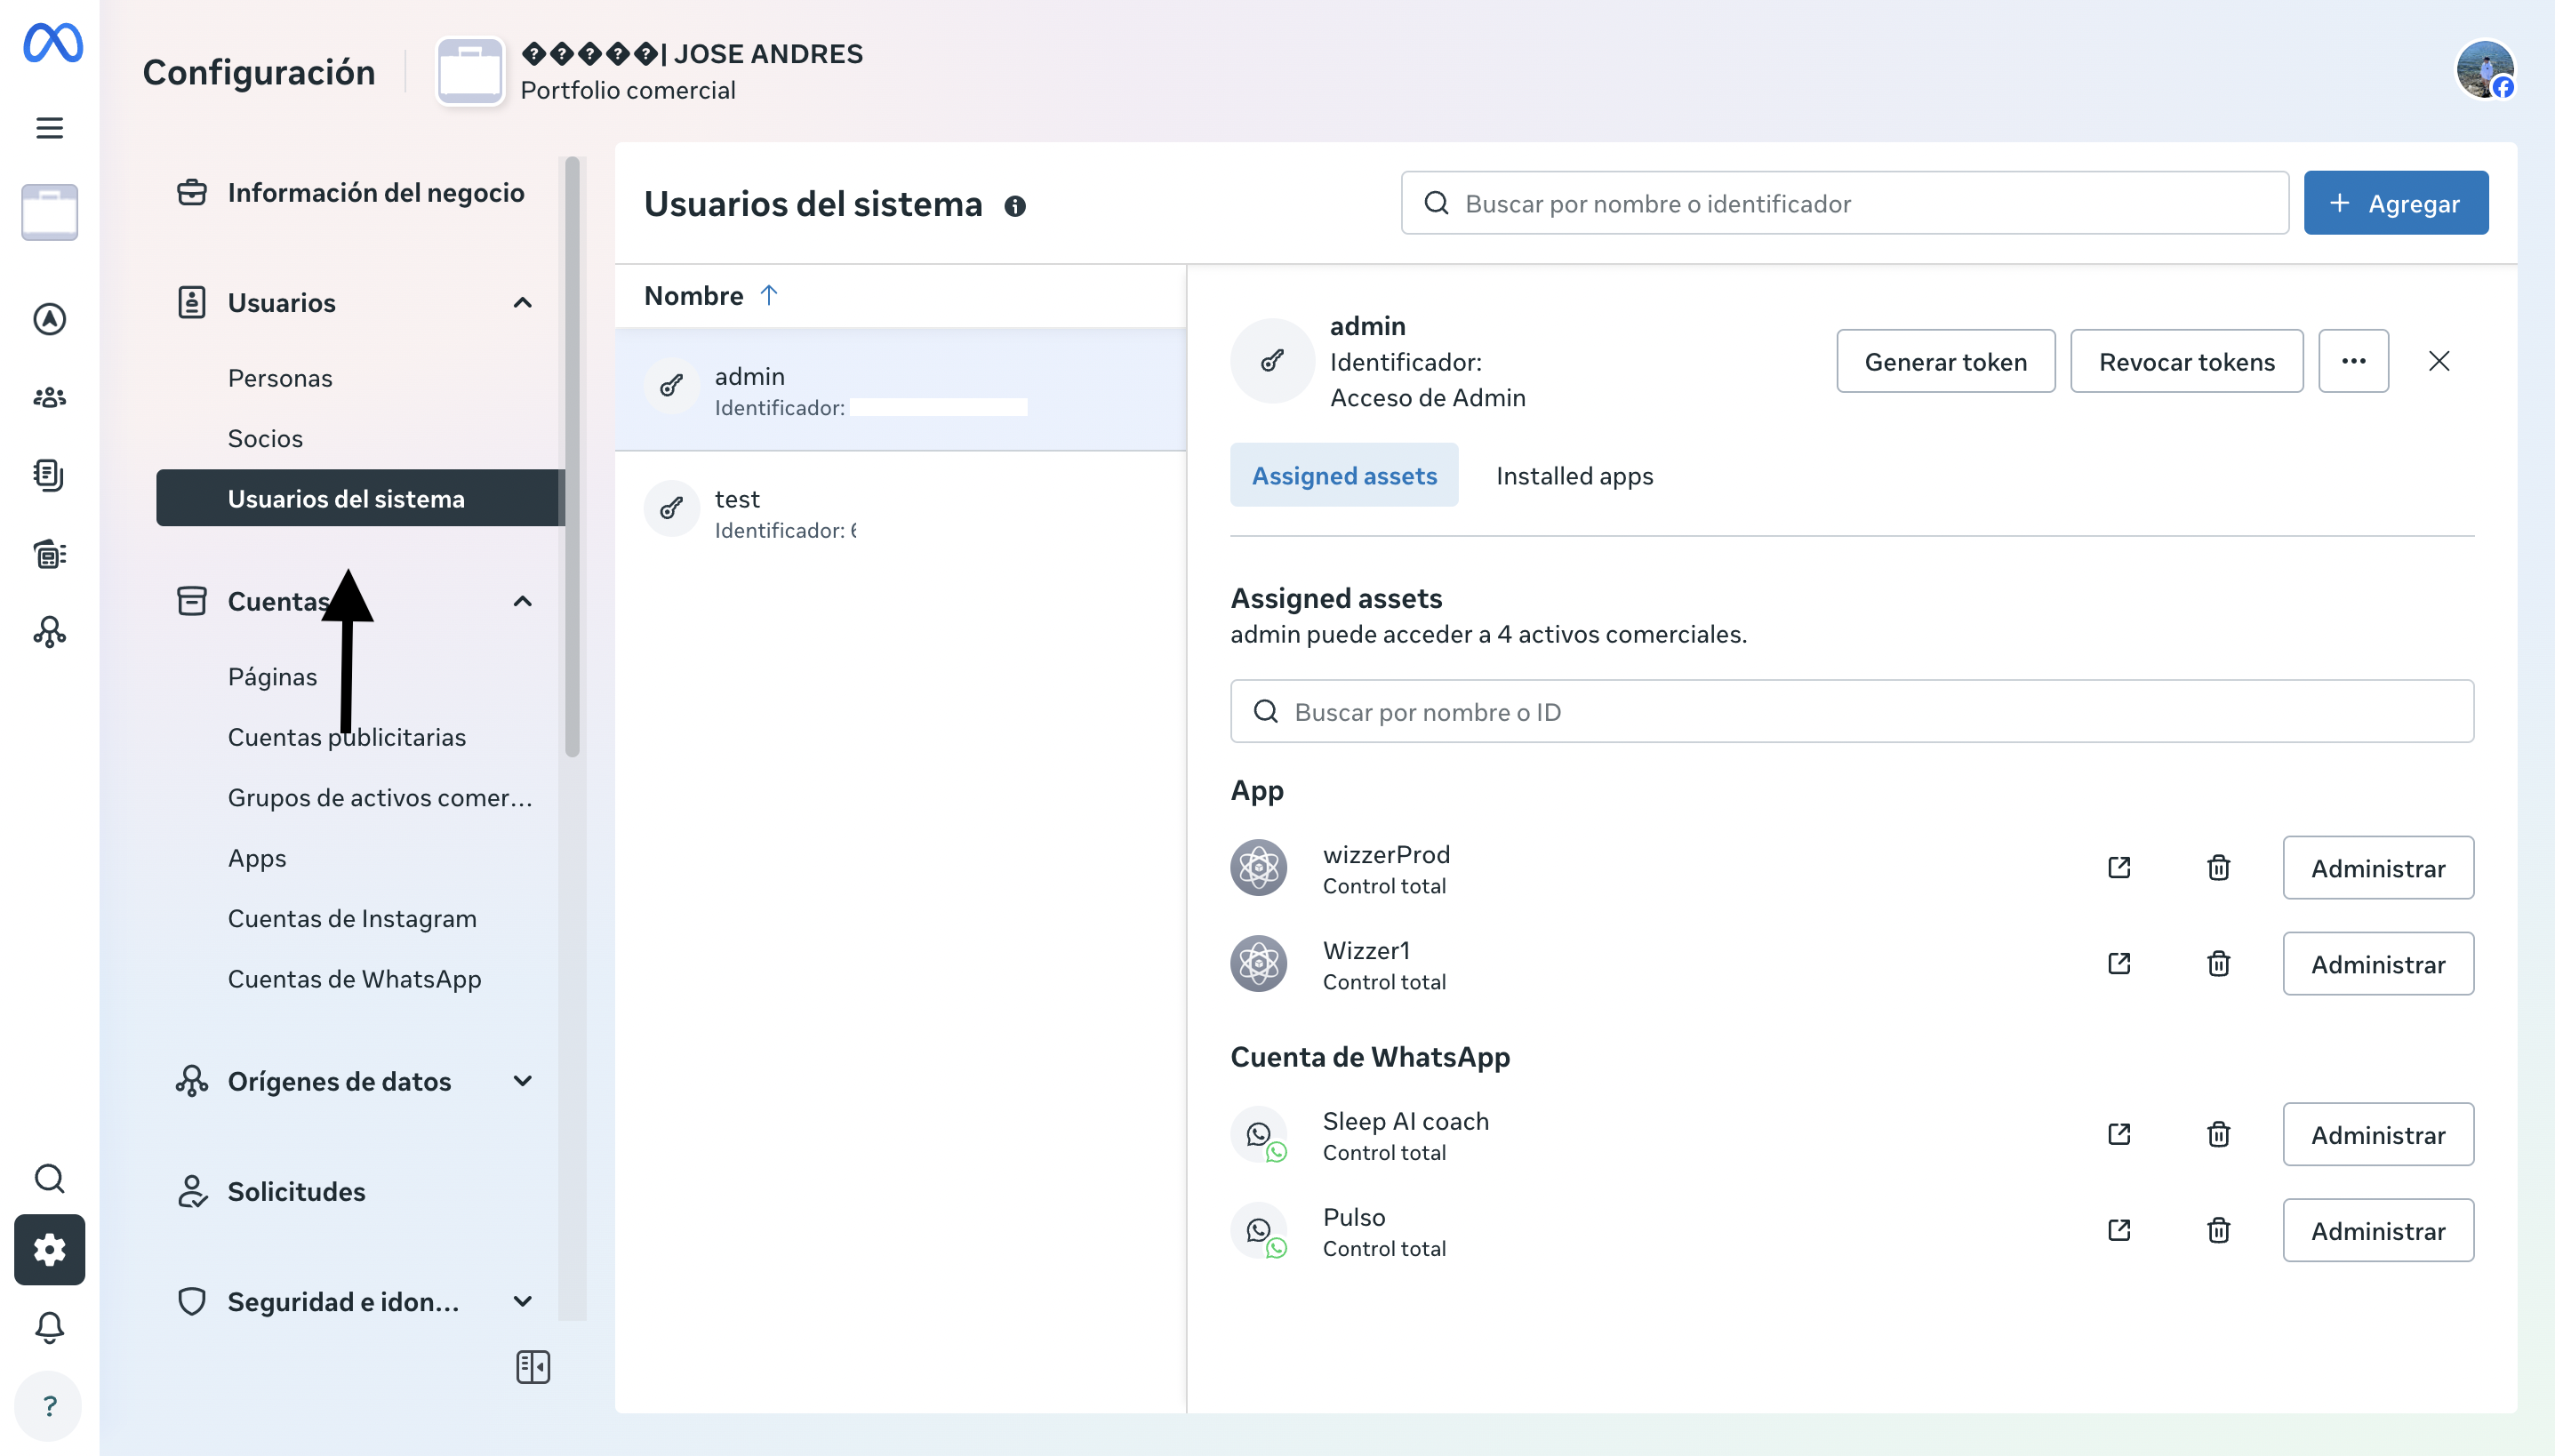
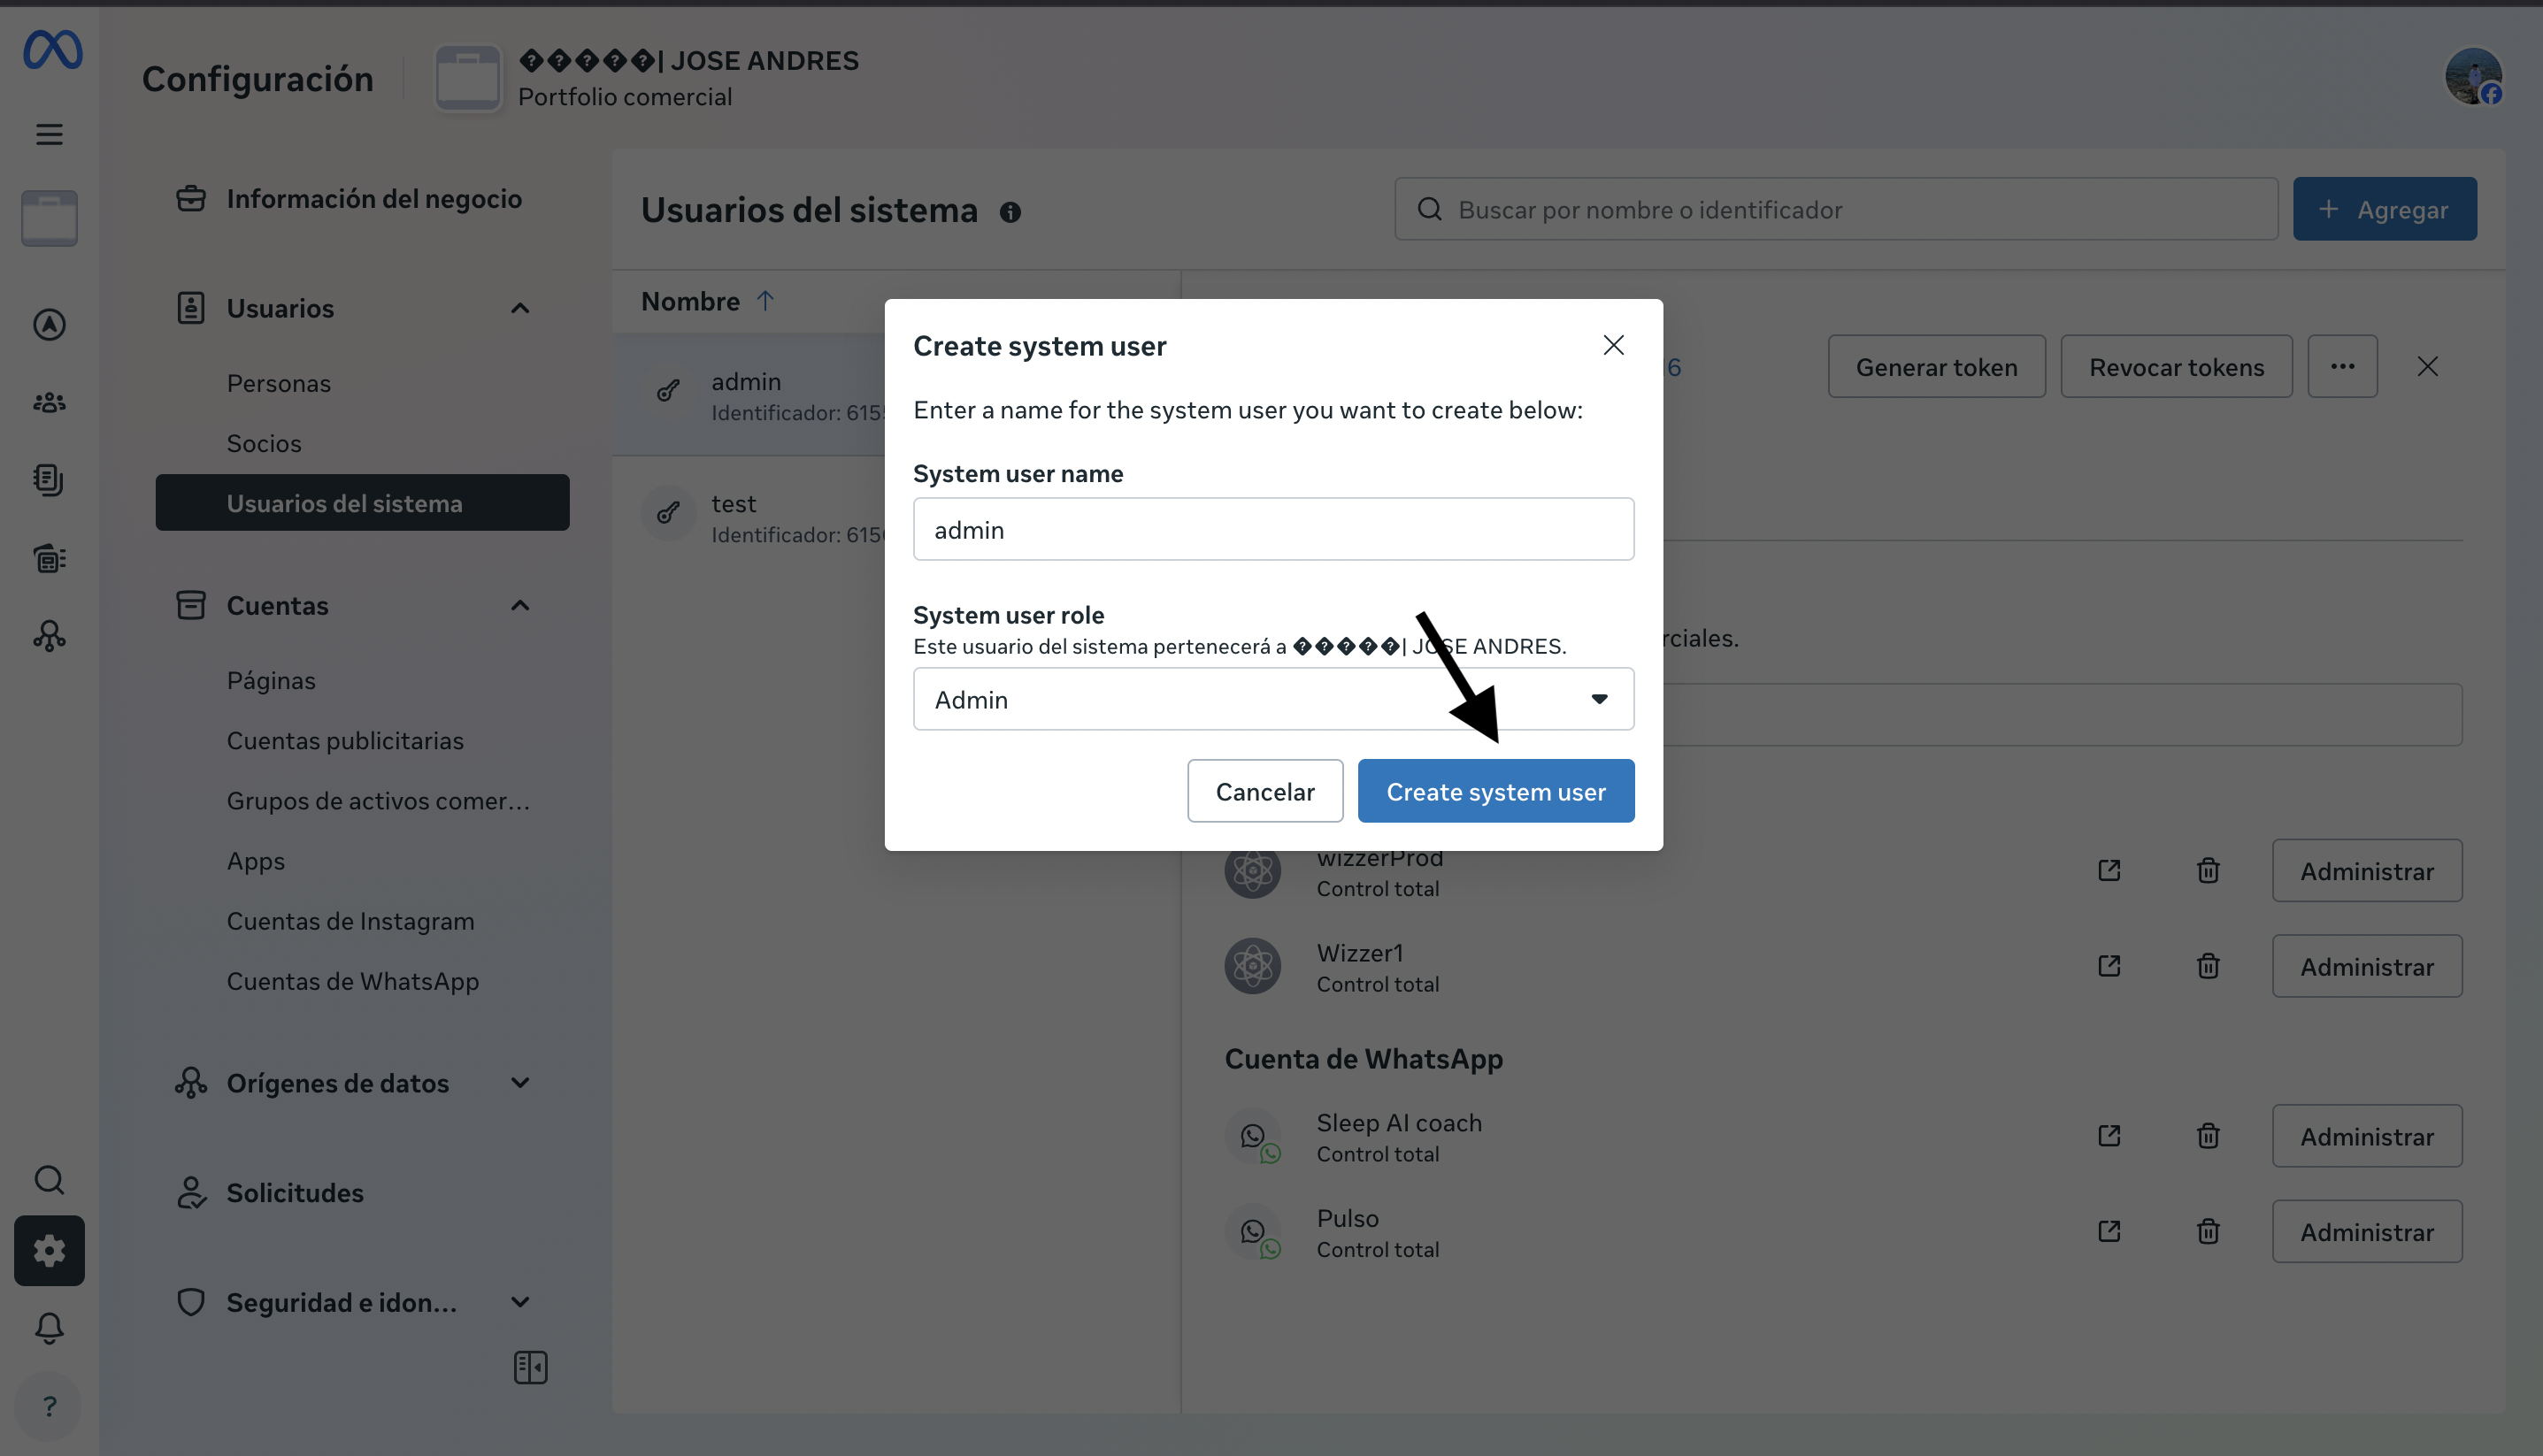
Step 8: Create a System User
- Go to the “System Users” section
- Create a new system user with “Administrator” role
- Click “Create system user”
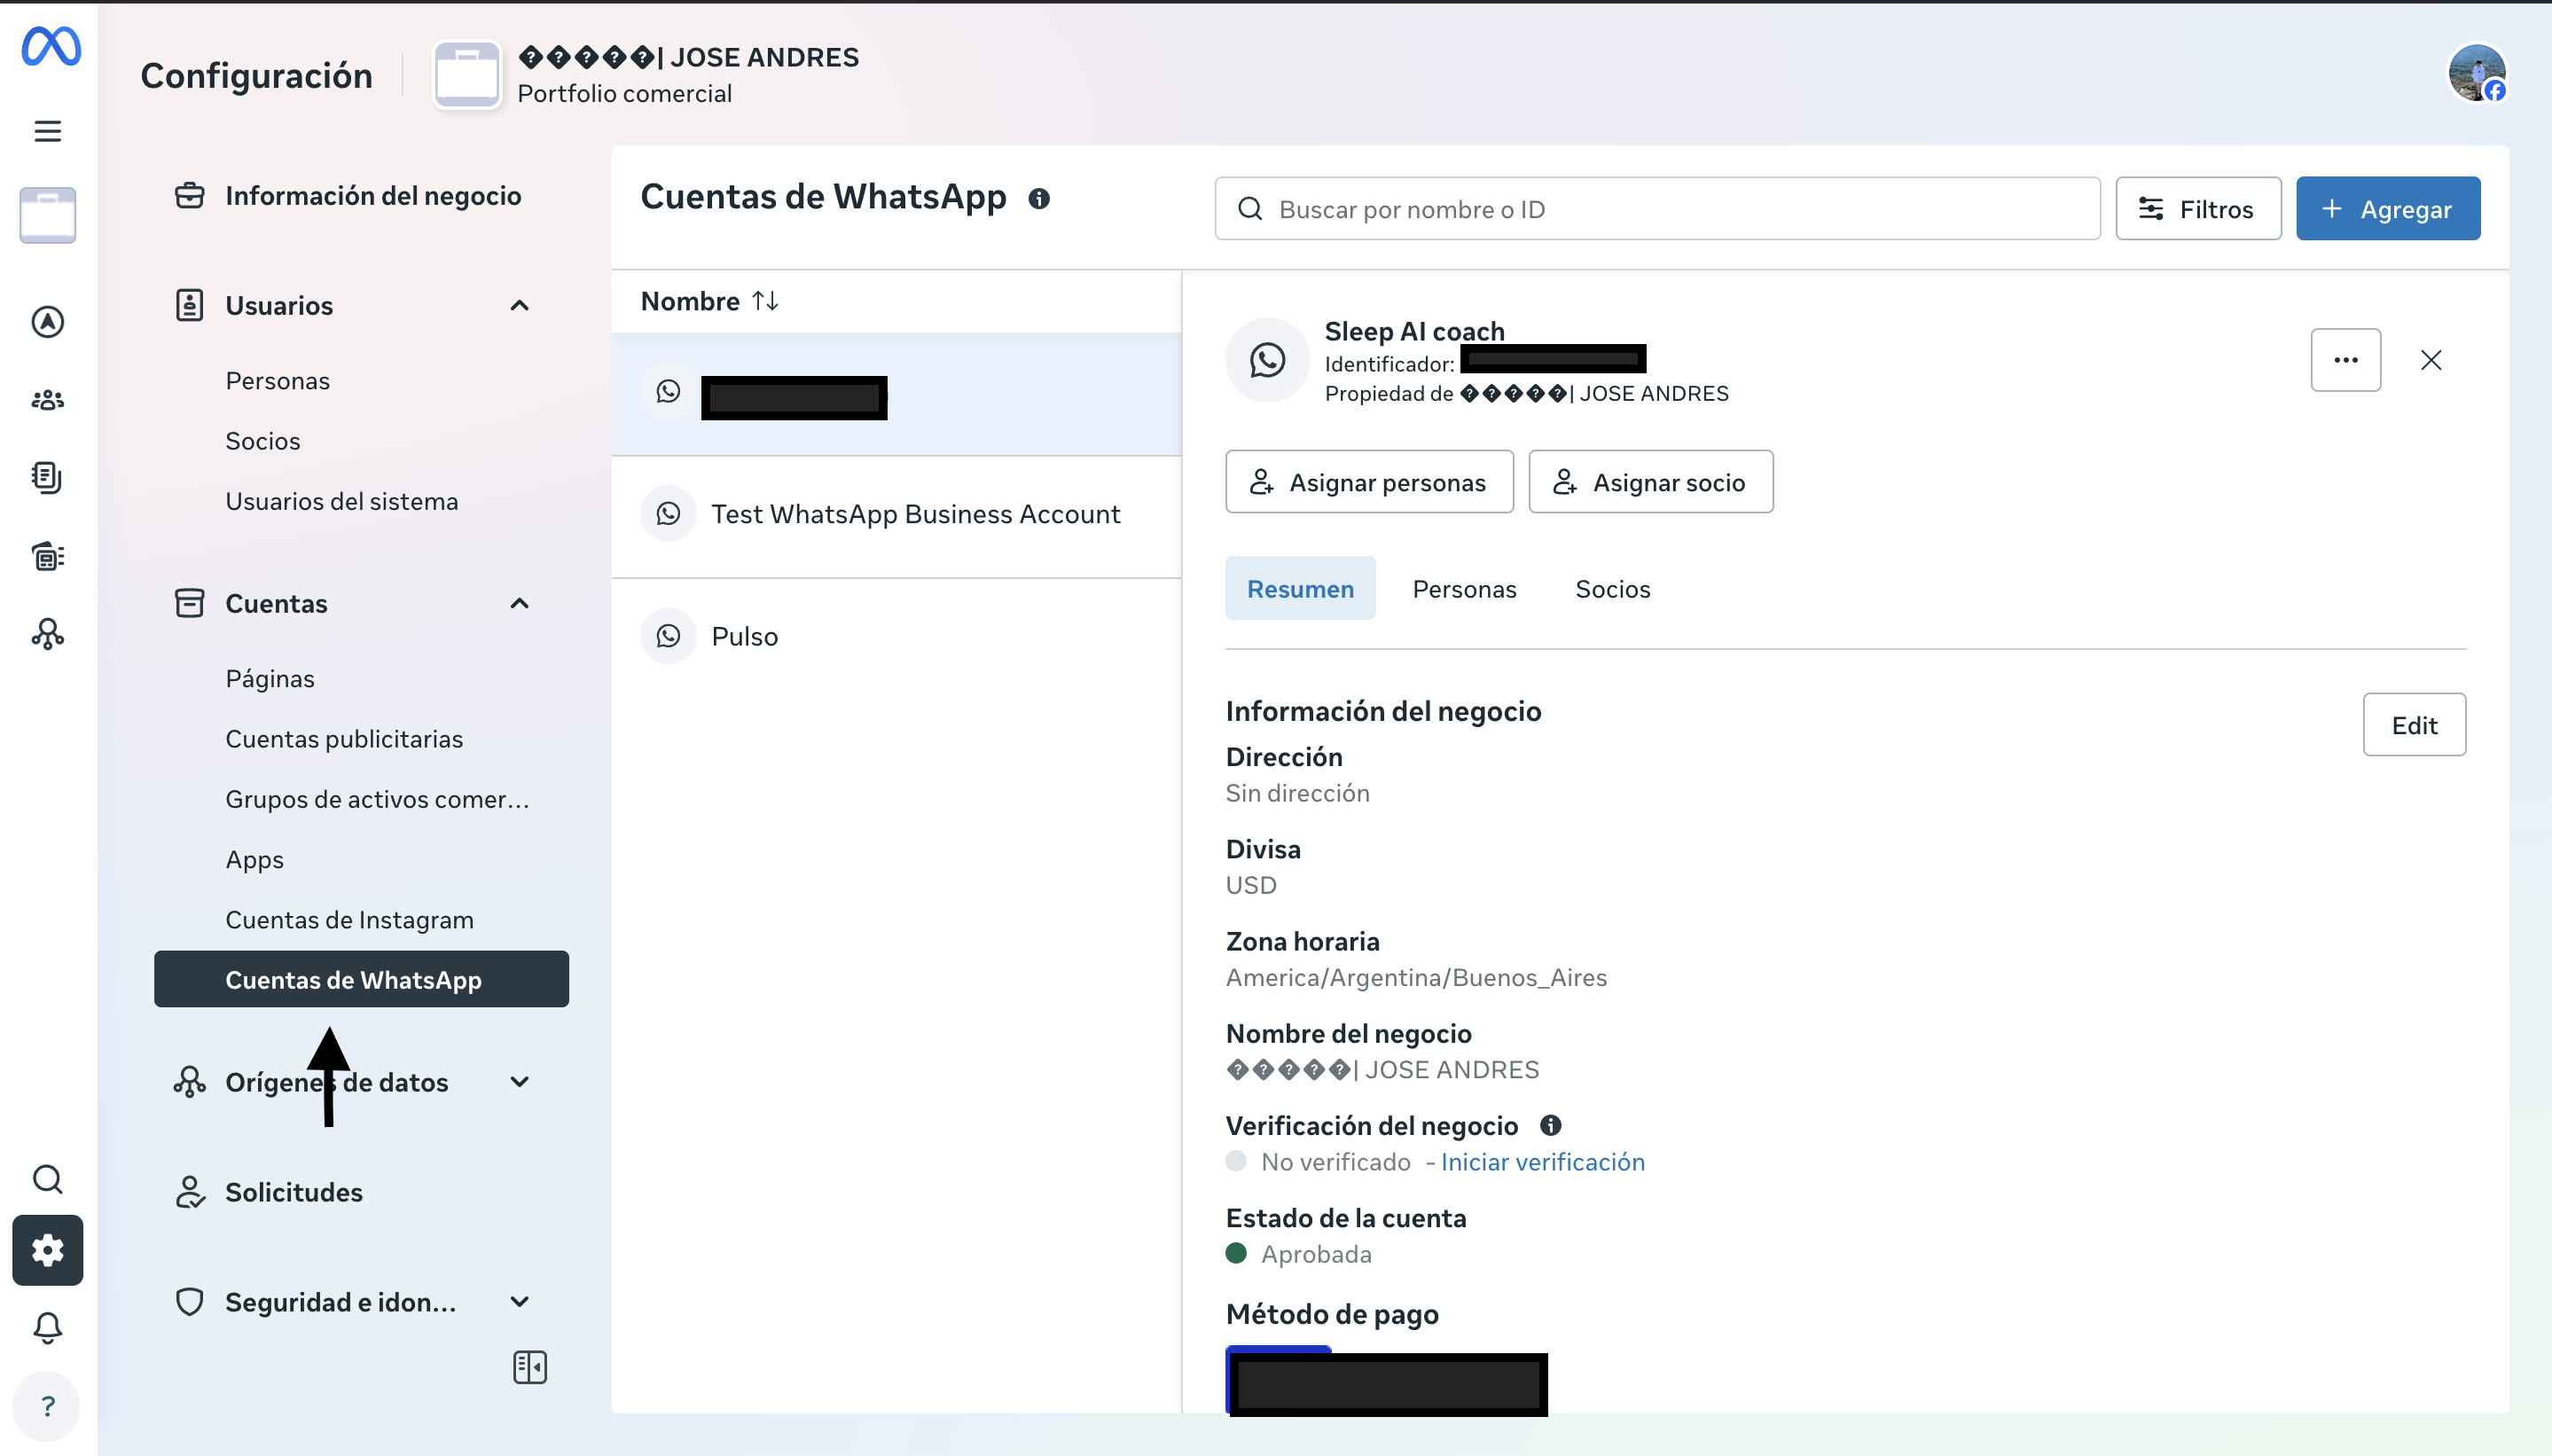
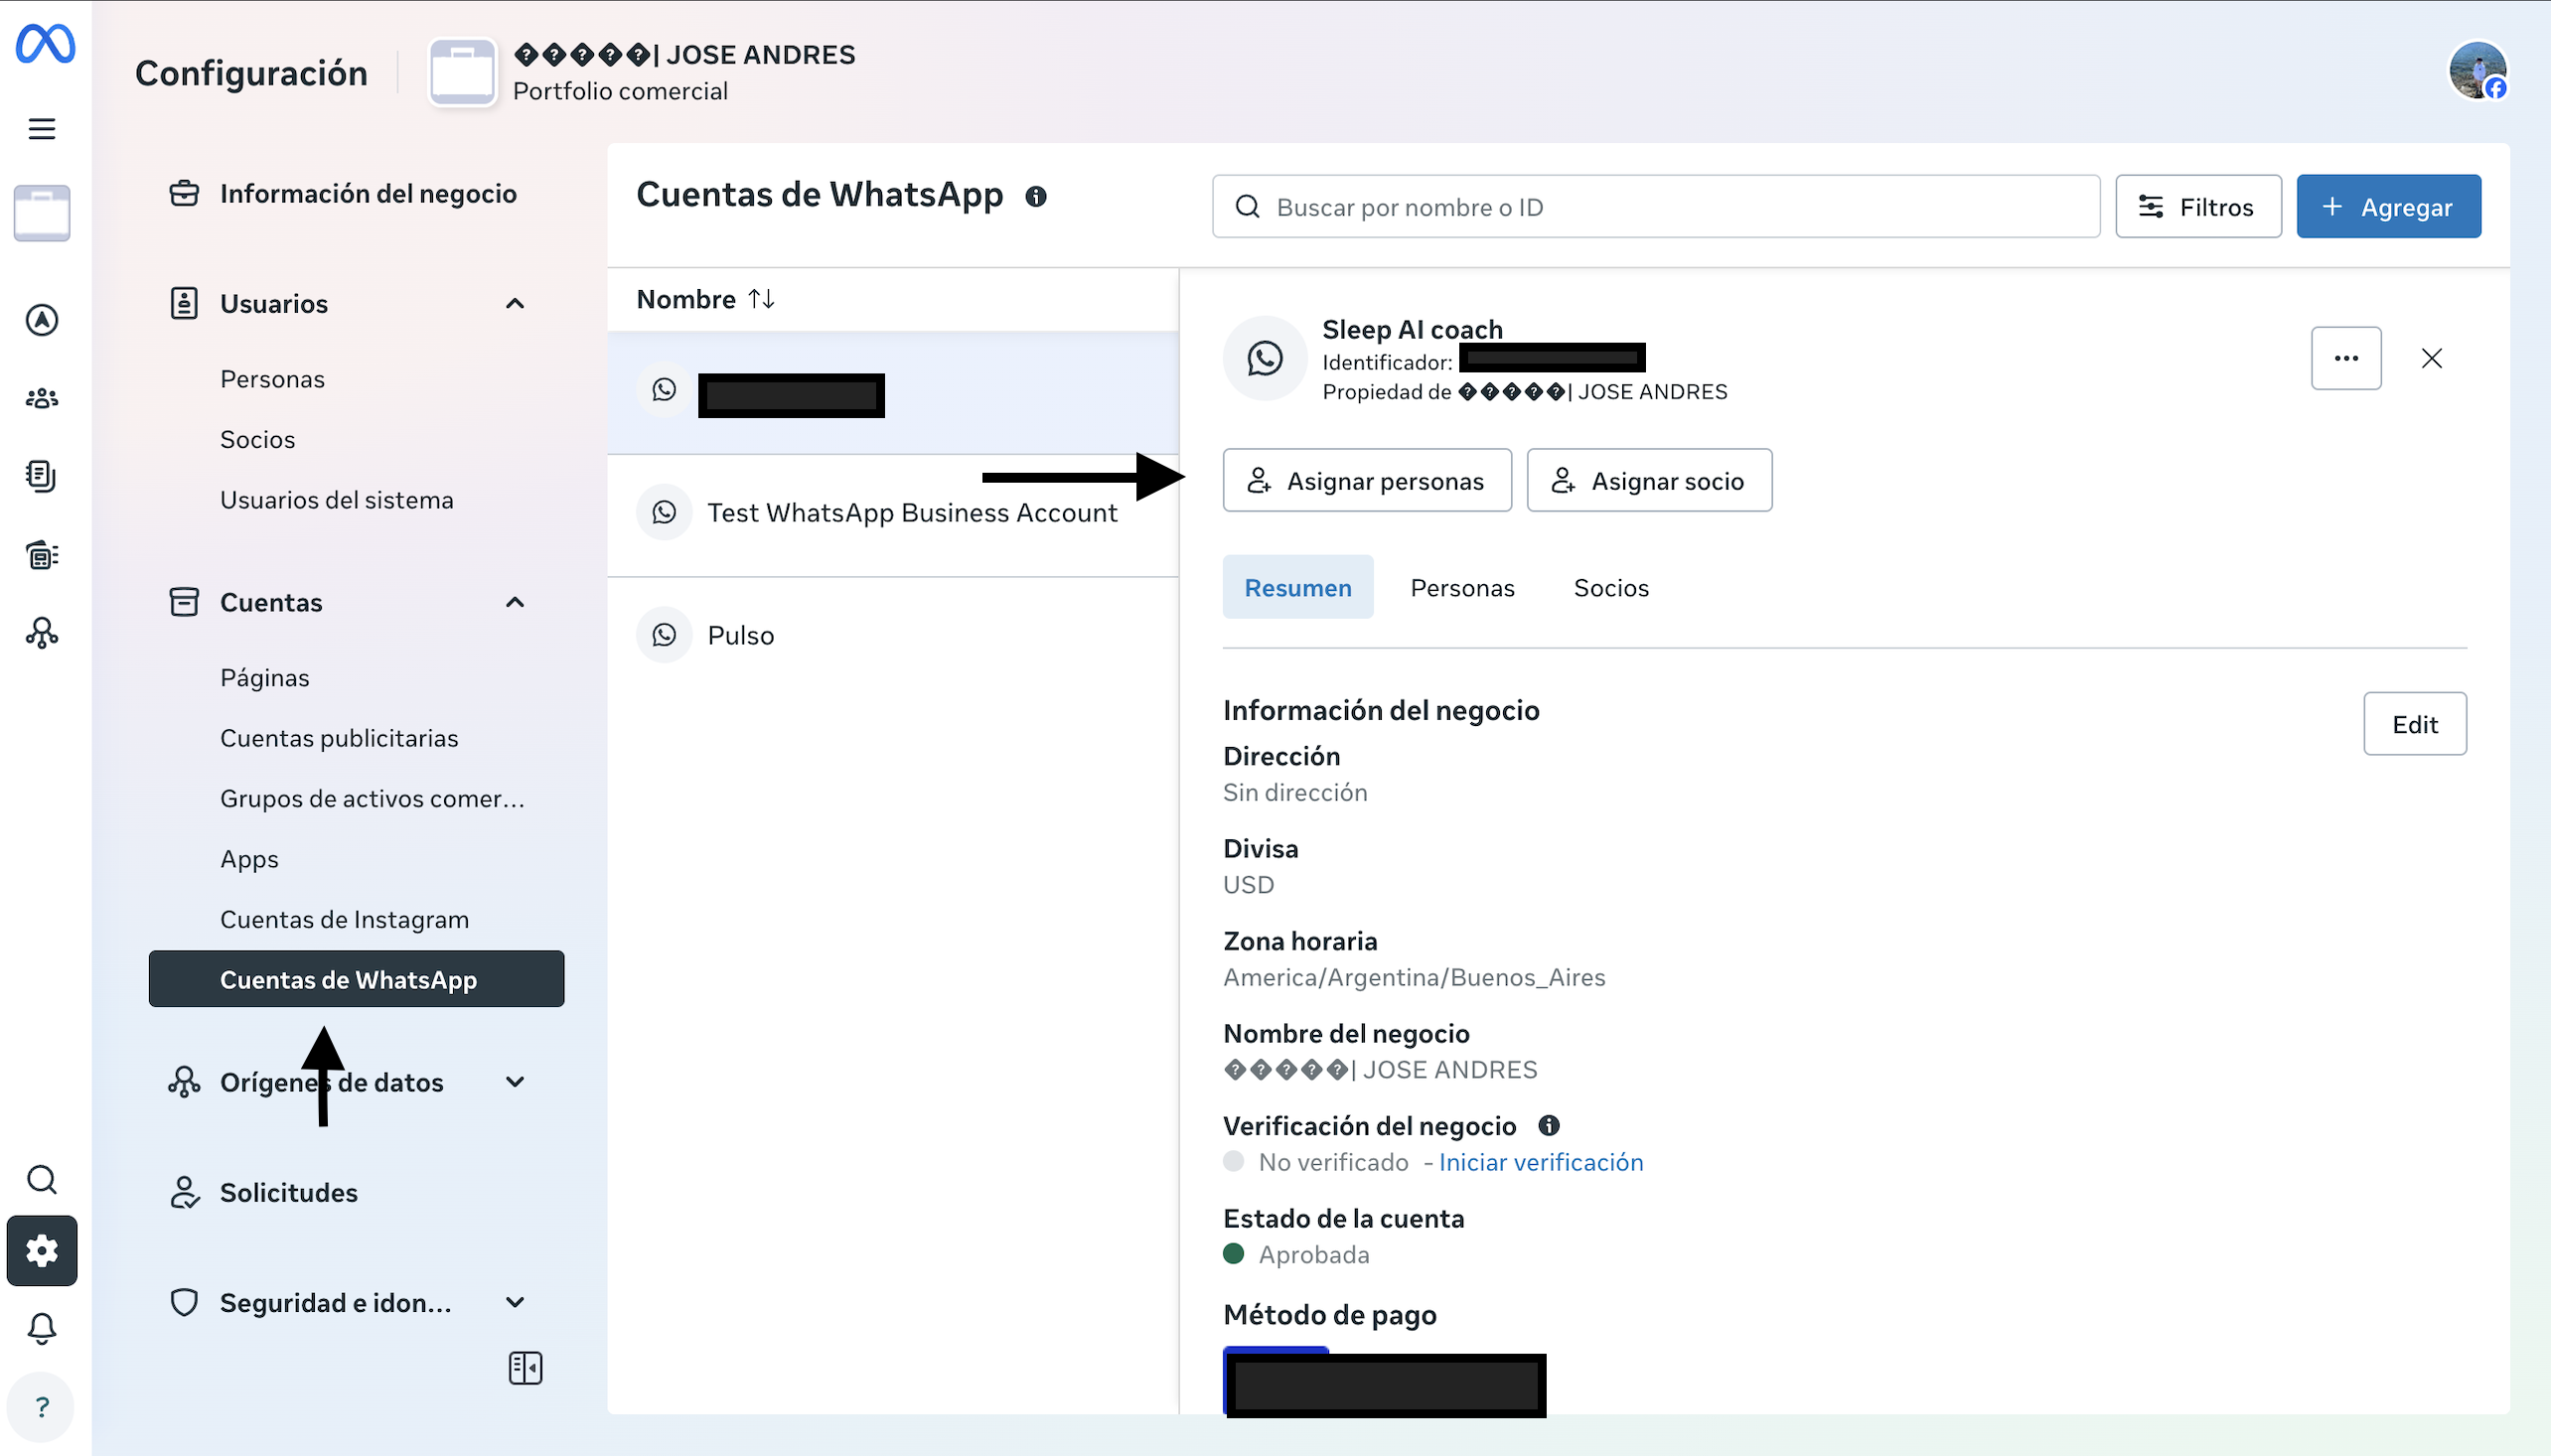
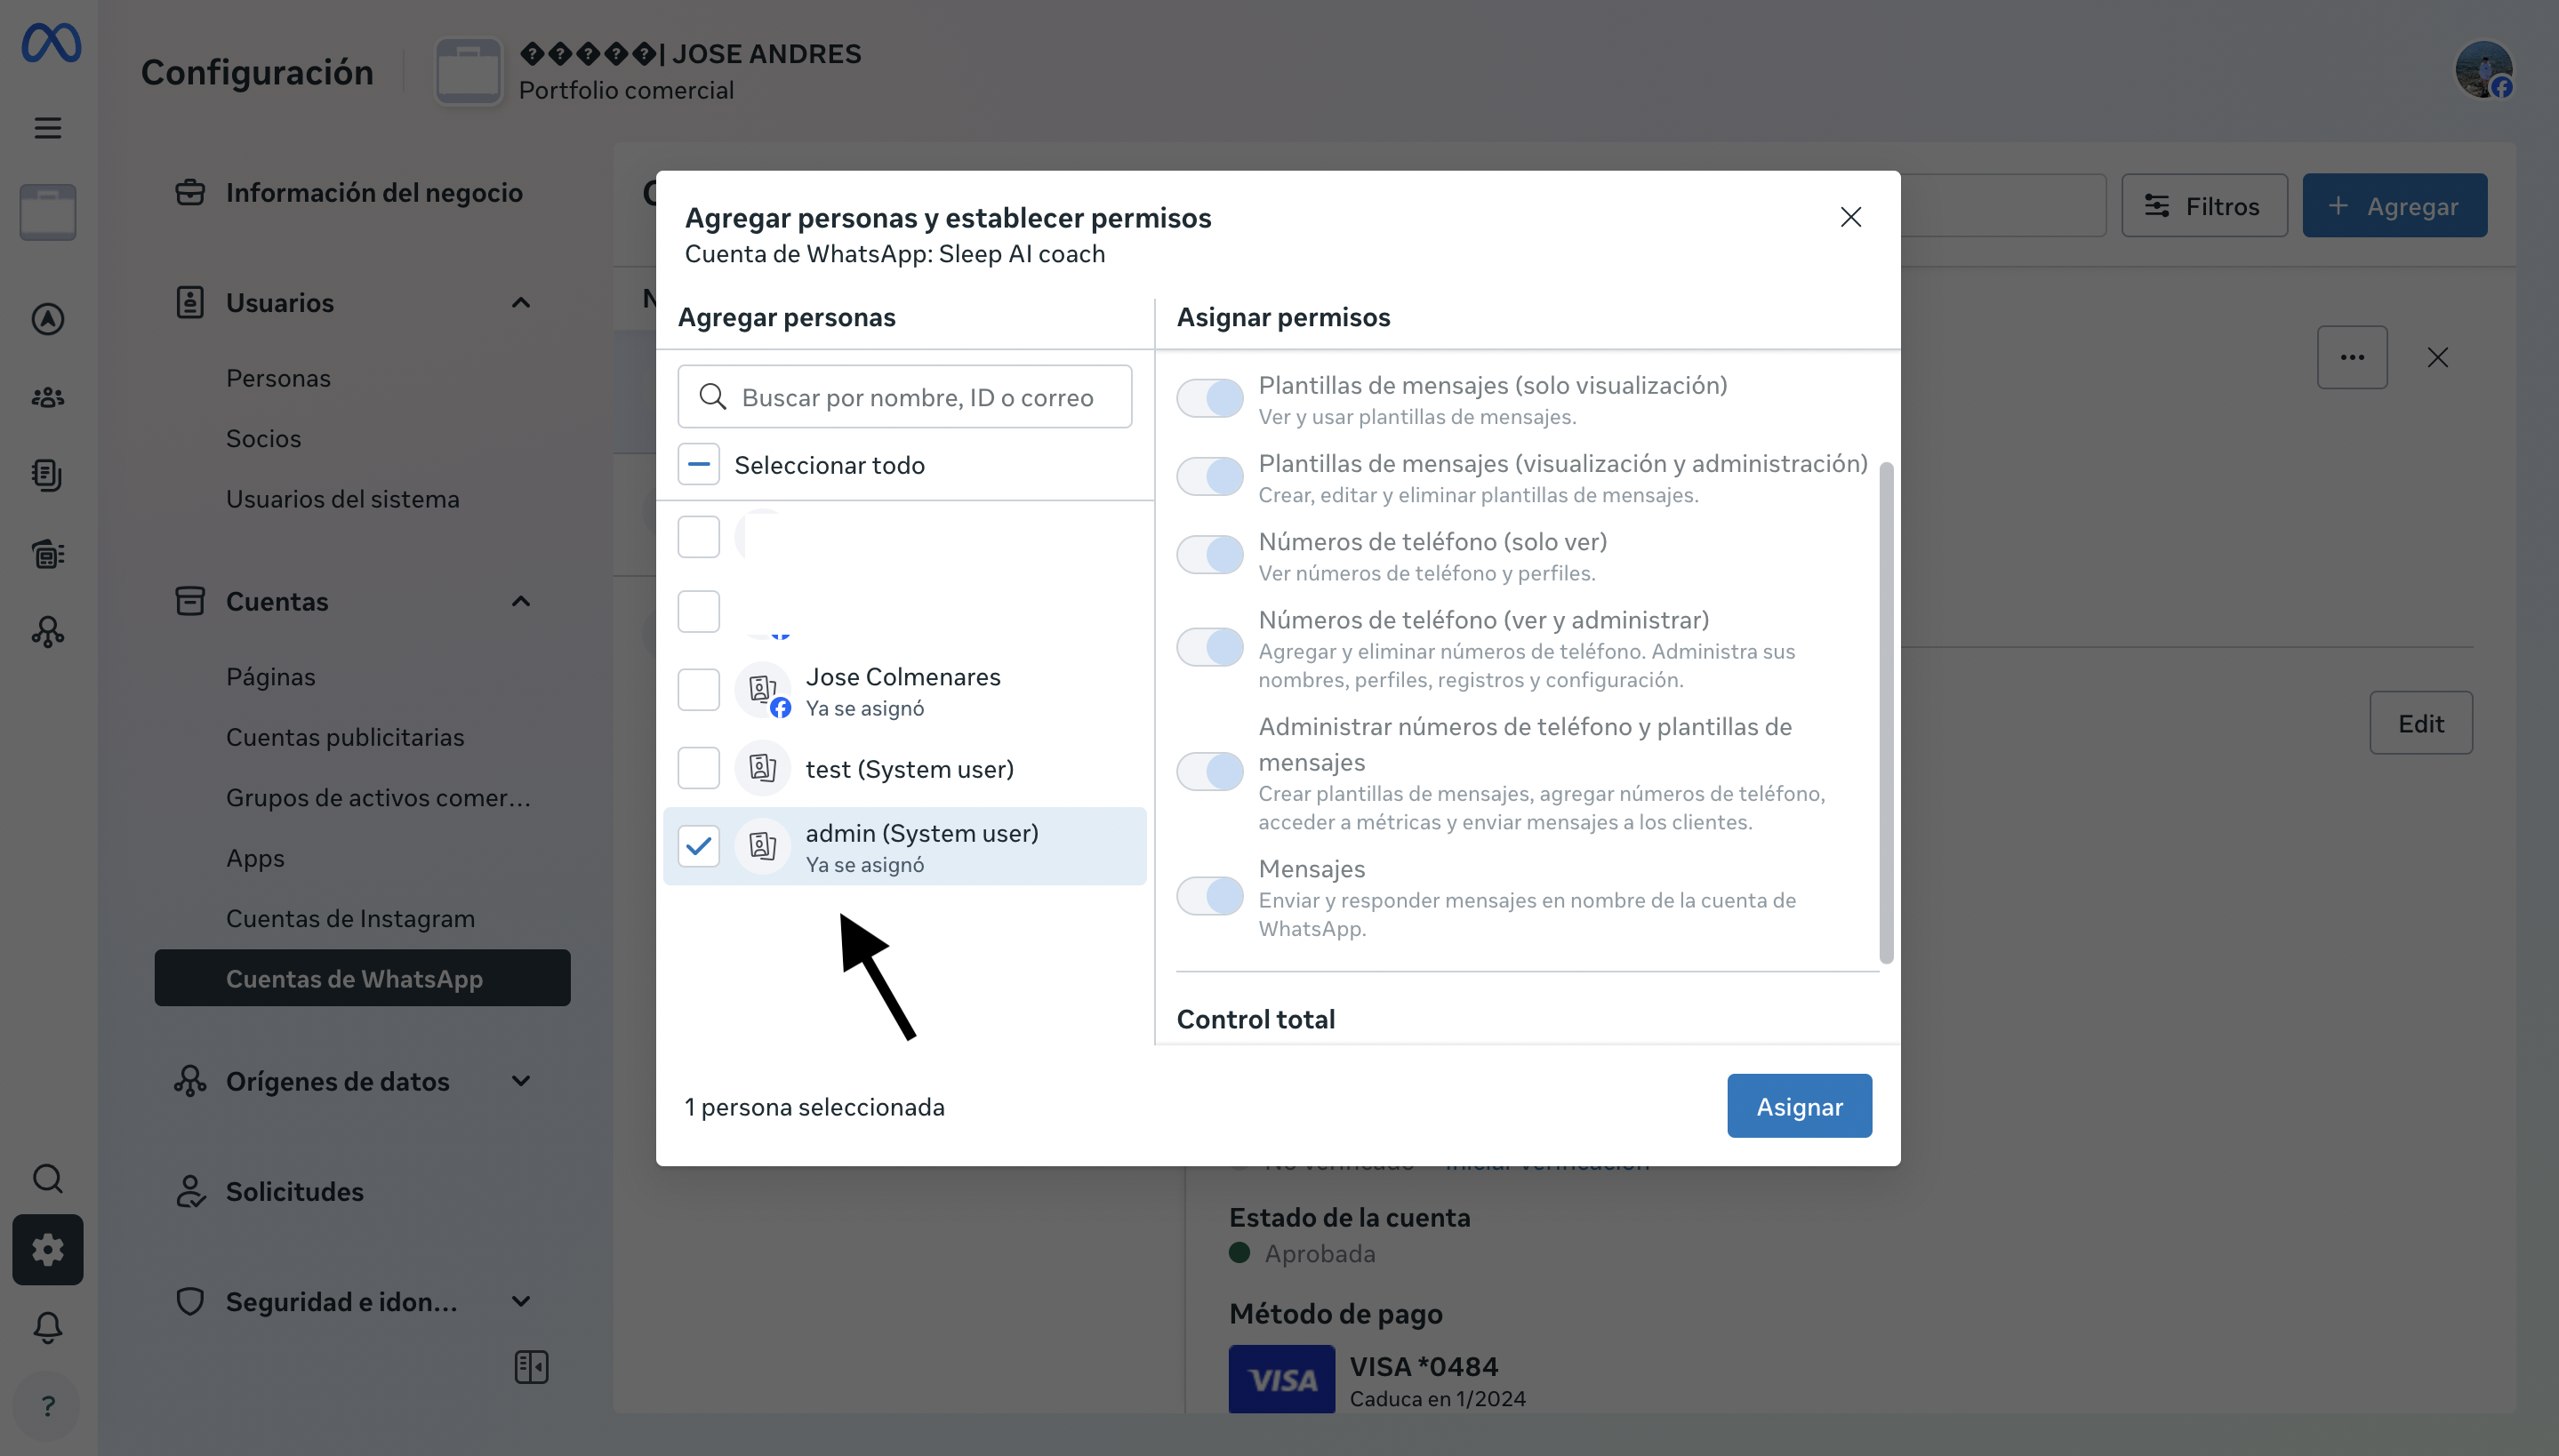
Step 9: Configure WhatsApp Account Access
In this step we will assign permissions to the system user:- Go to the “WhatsApp Account” section
- Click “Assign person”
- Select the system user you created
- Assign “Full control” to the system user
- Click “Assign” to confirm permissions
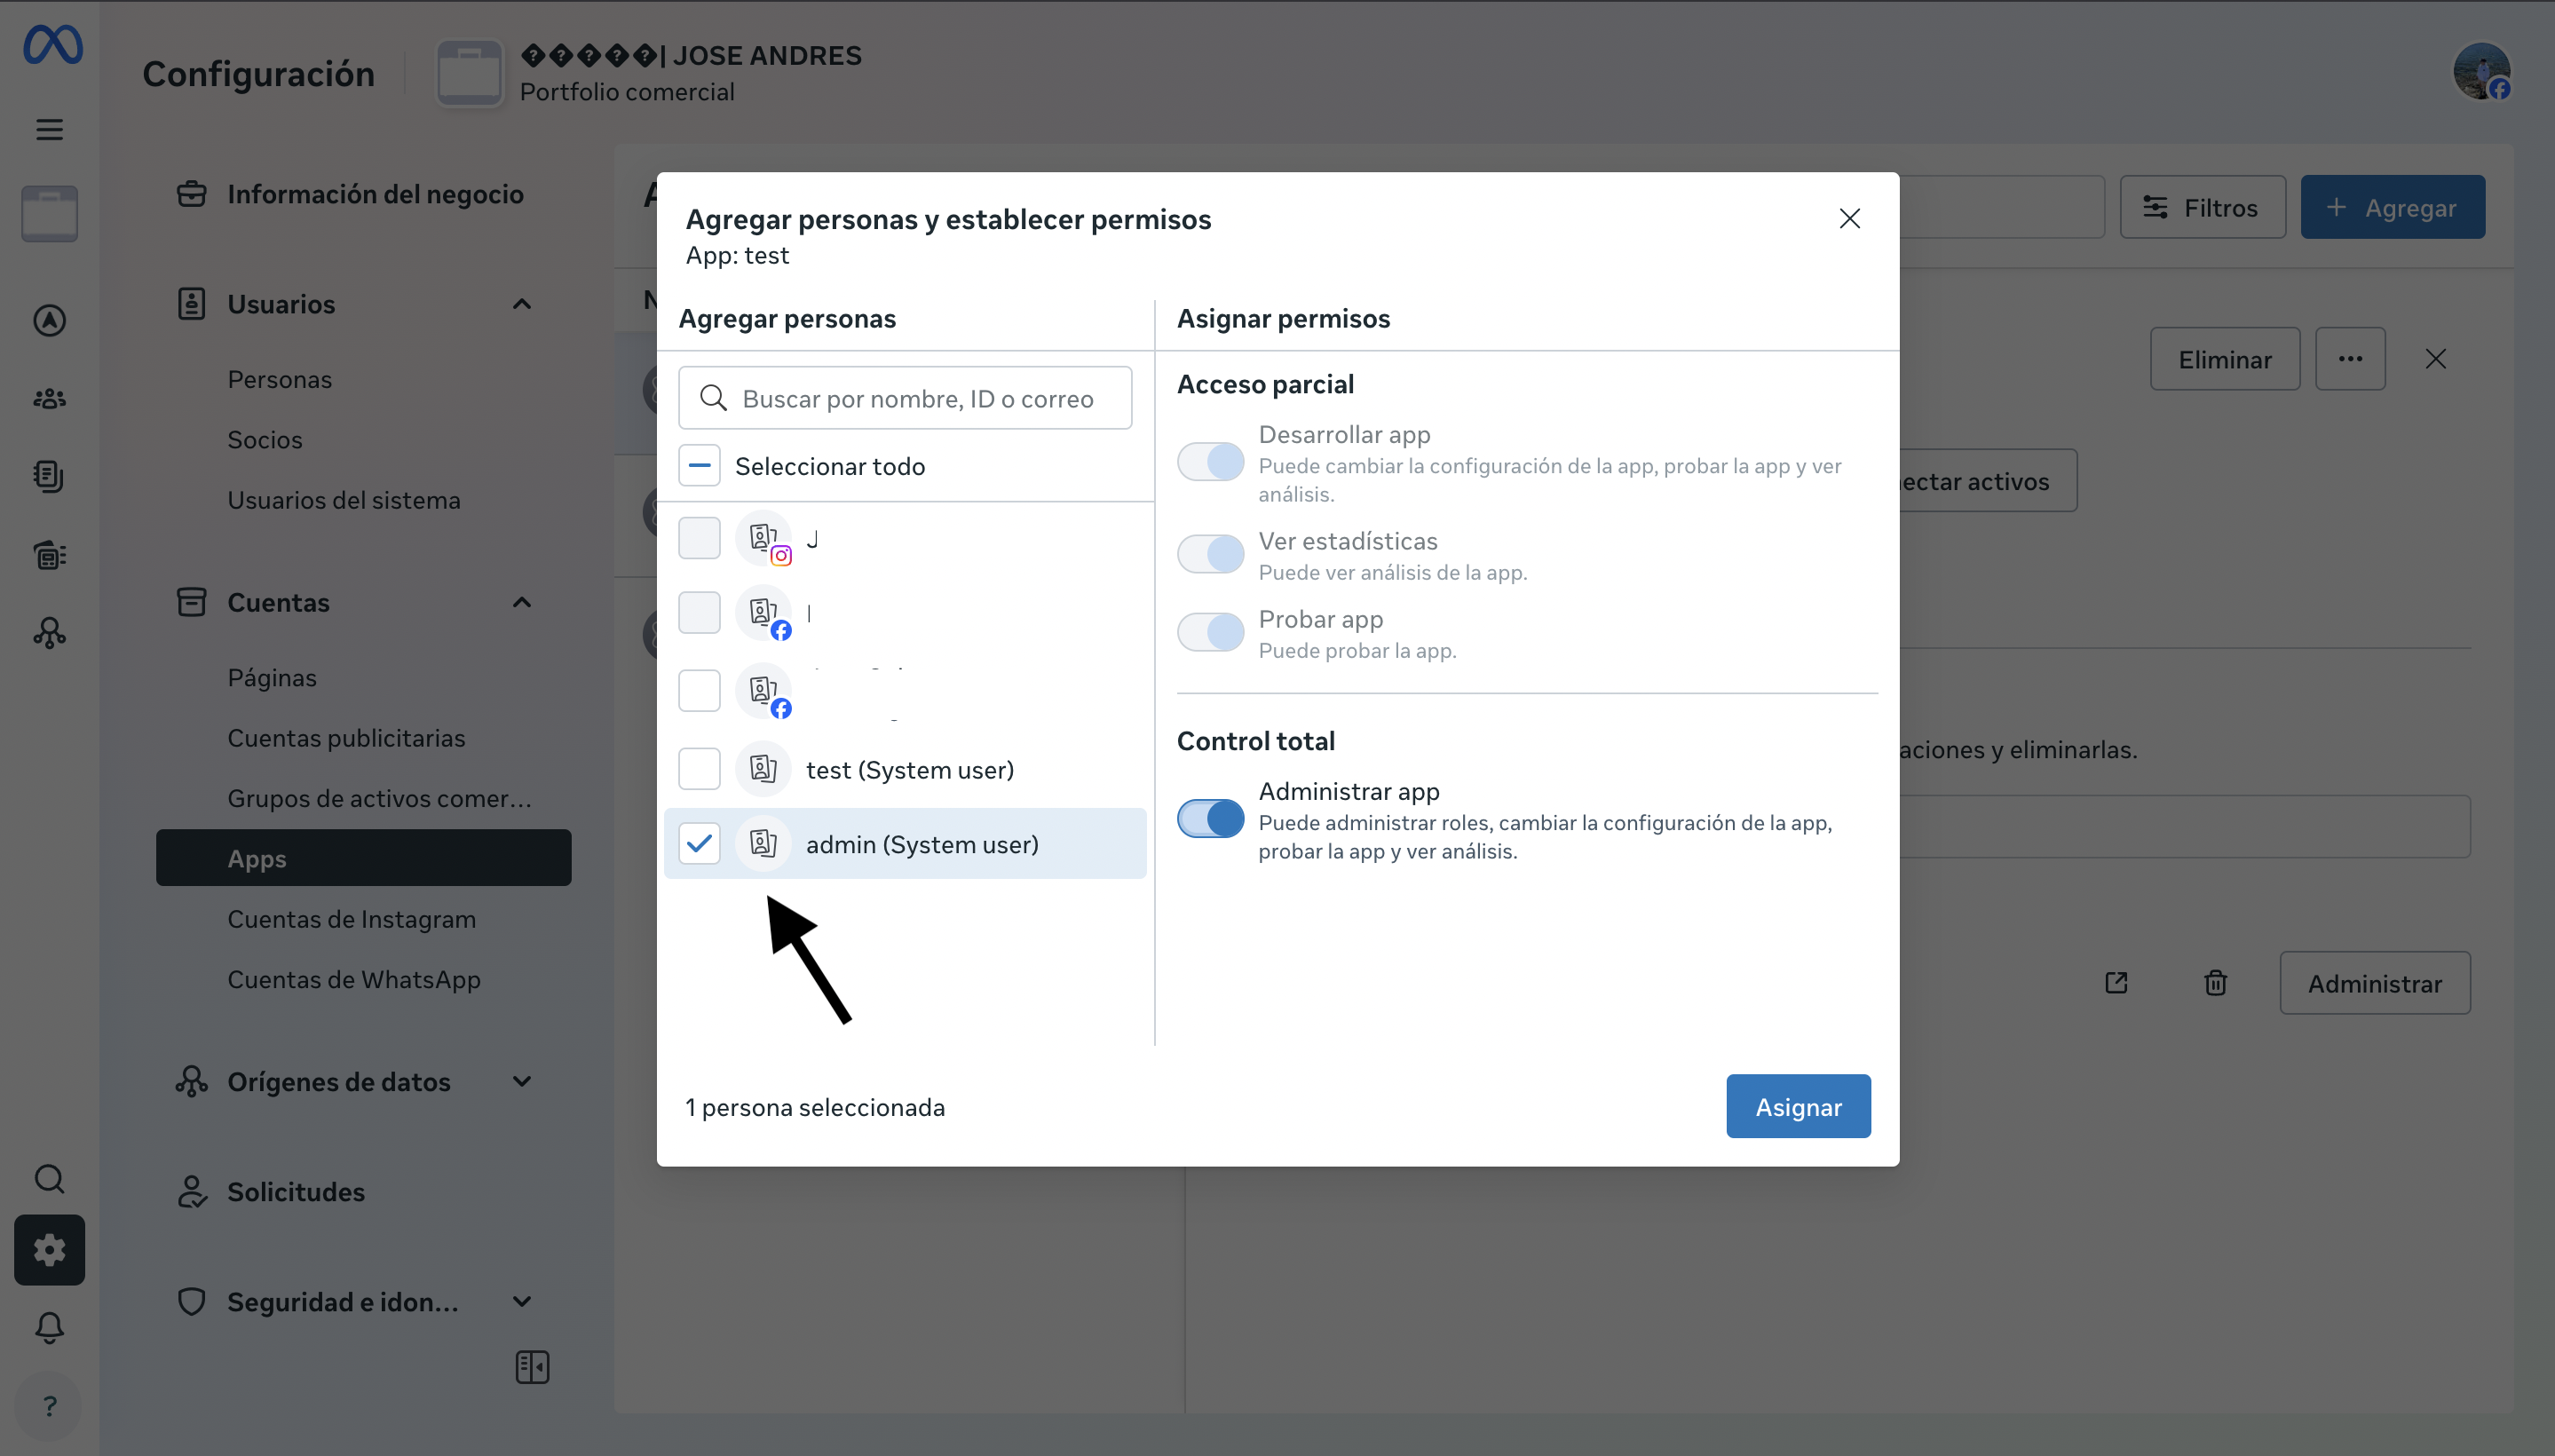
Step 10: Configure Application Access
Repeat the permission assignment process for the application:- Go to the “Apps” section
- Select your application
- Assign “Full control” to the system user
-
Click “Assign” to confirm
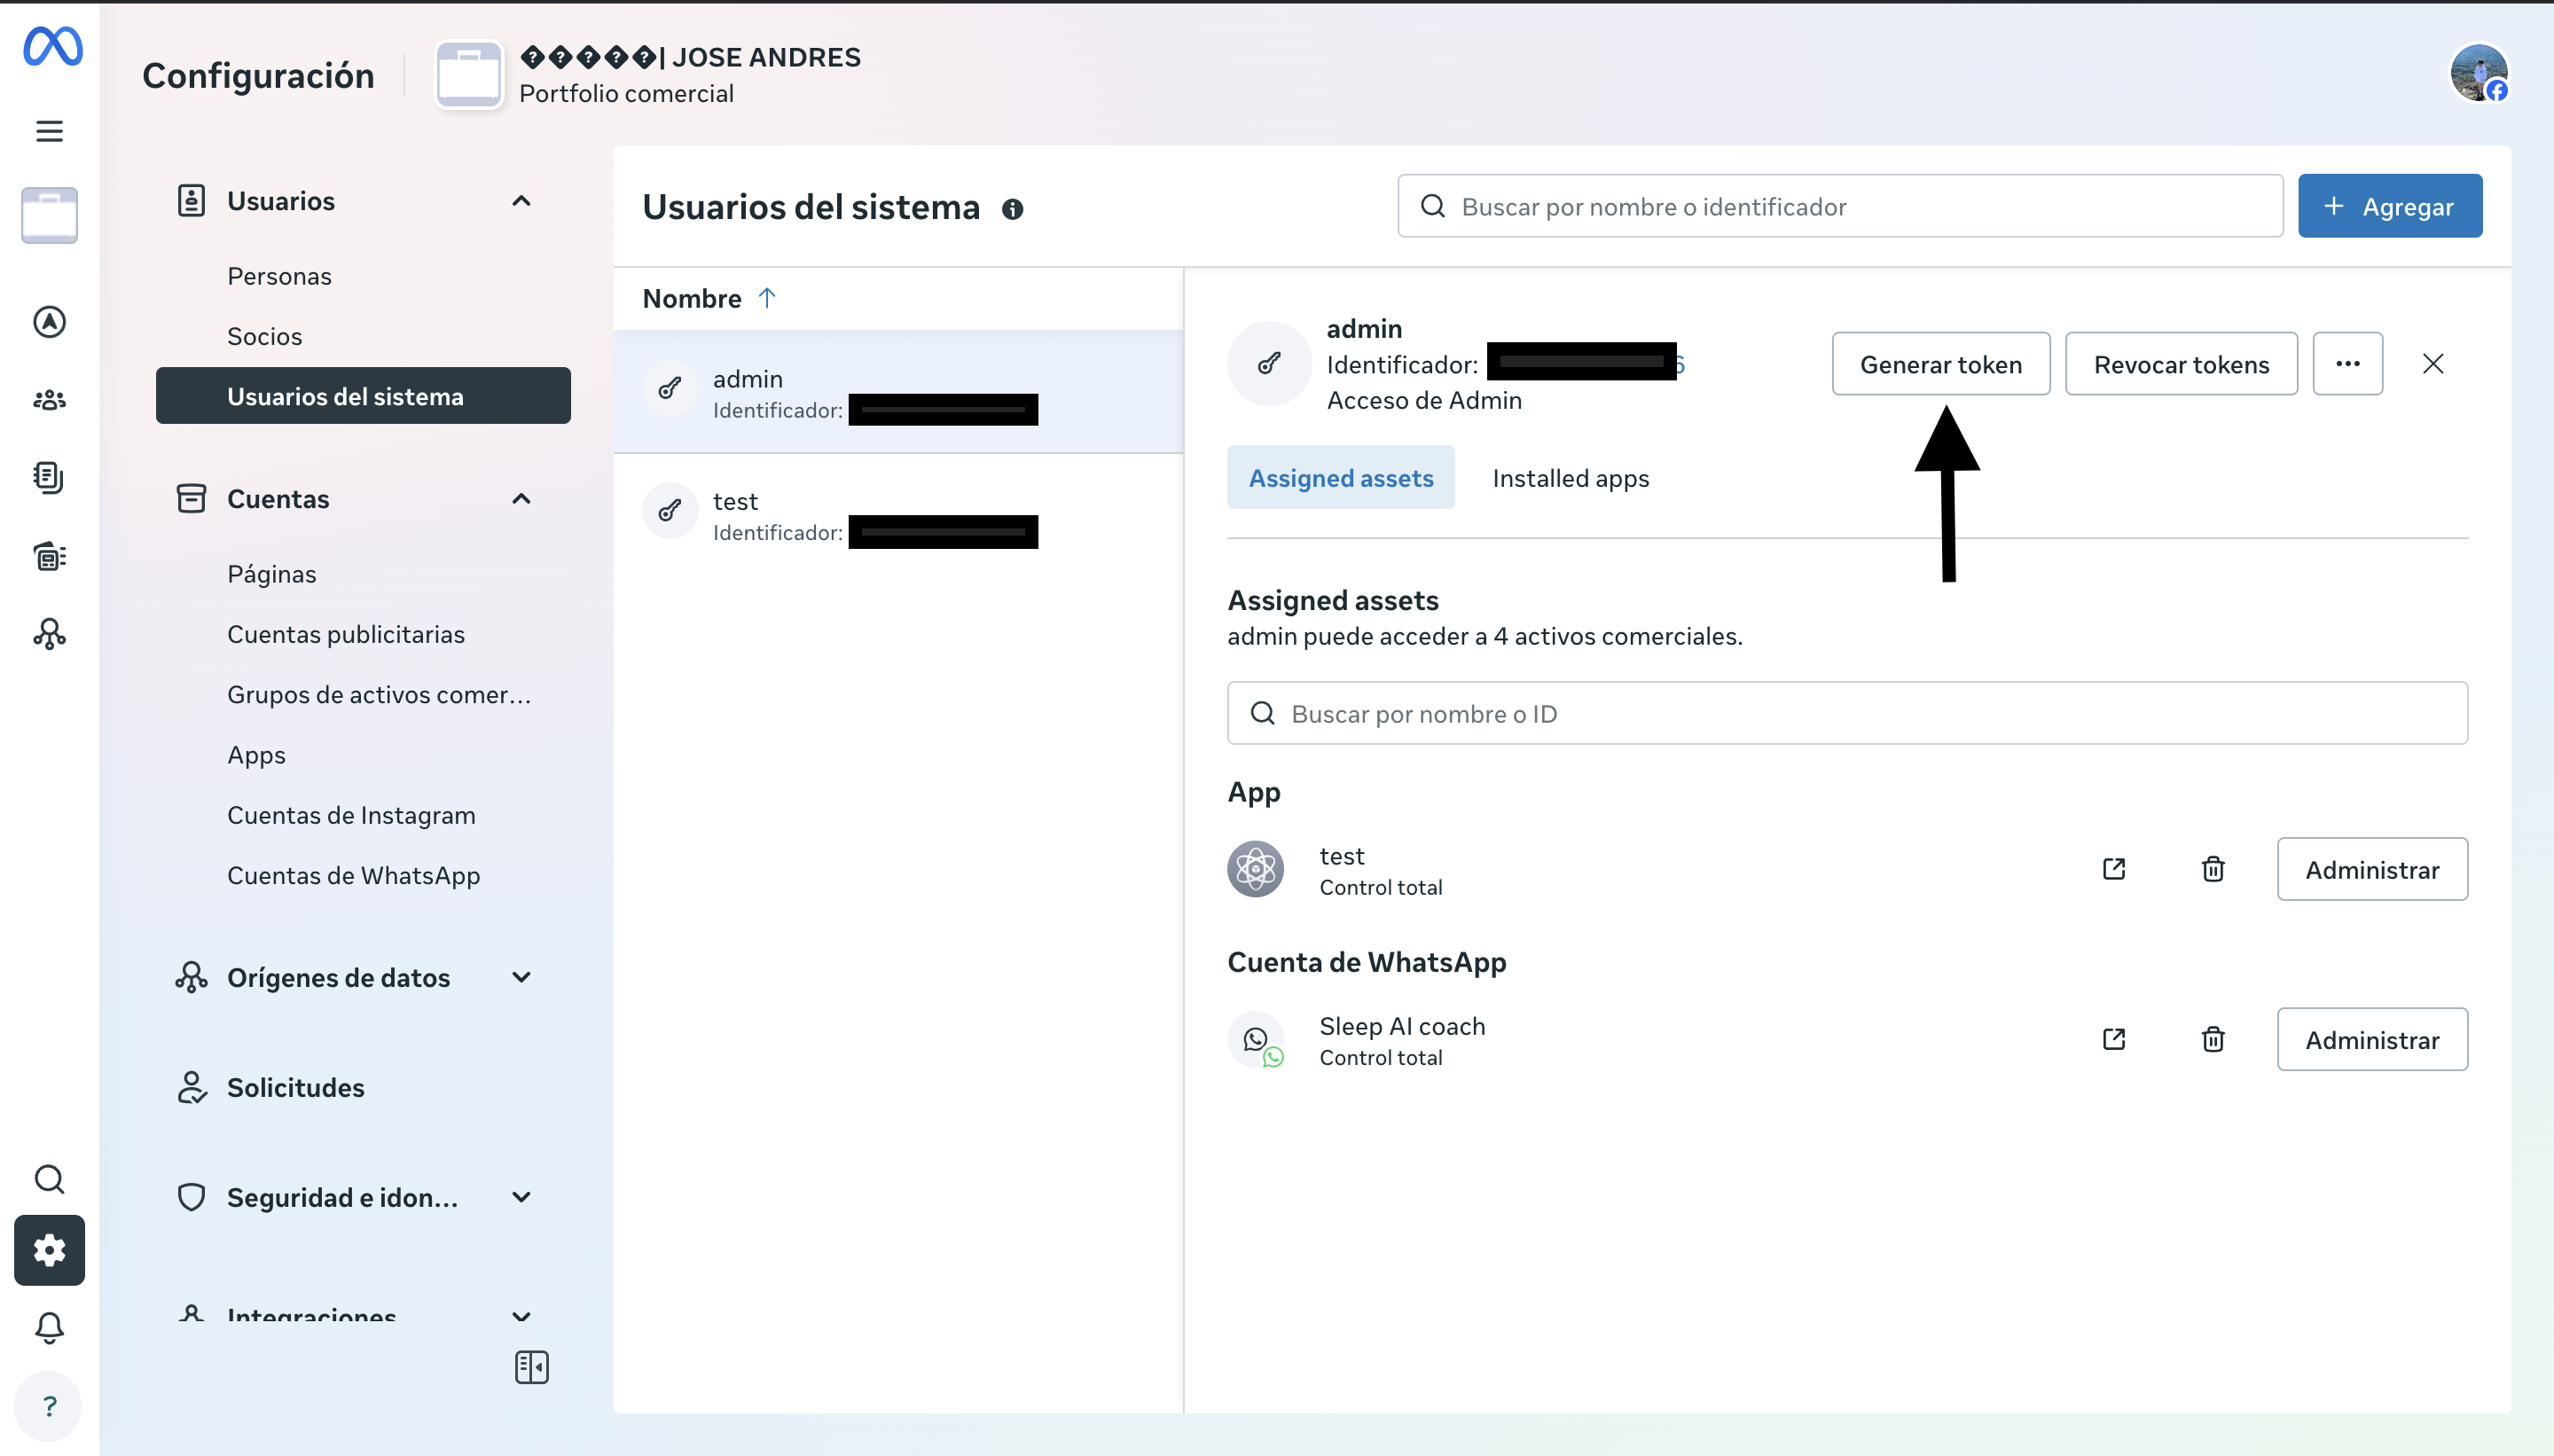
Step 11: Generate the Permanent Token
Finally, we will generate the permanent token:- Return to the “System Users” section
- Click “Generate token” for the user you created
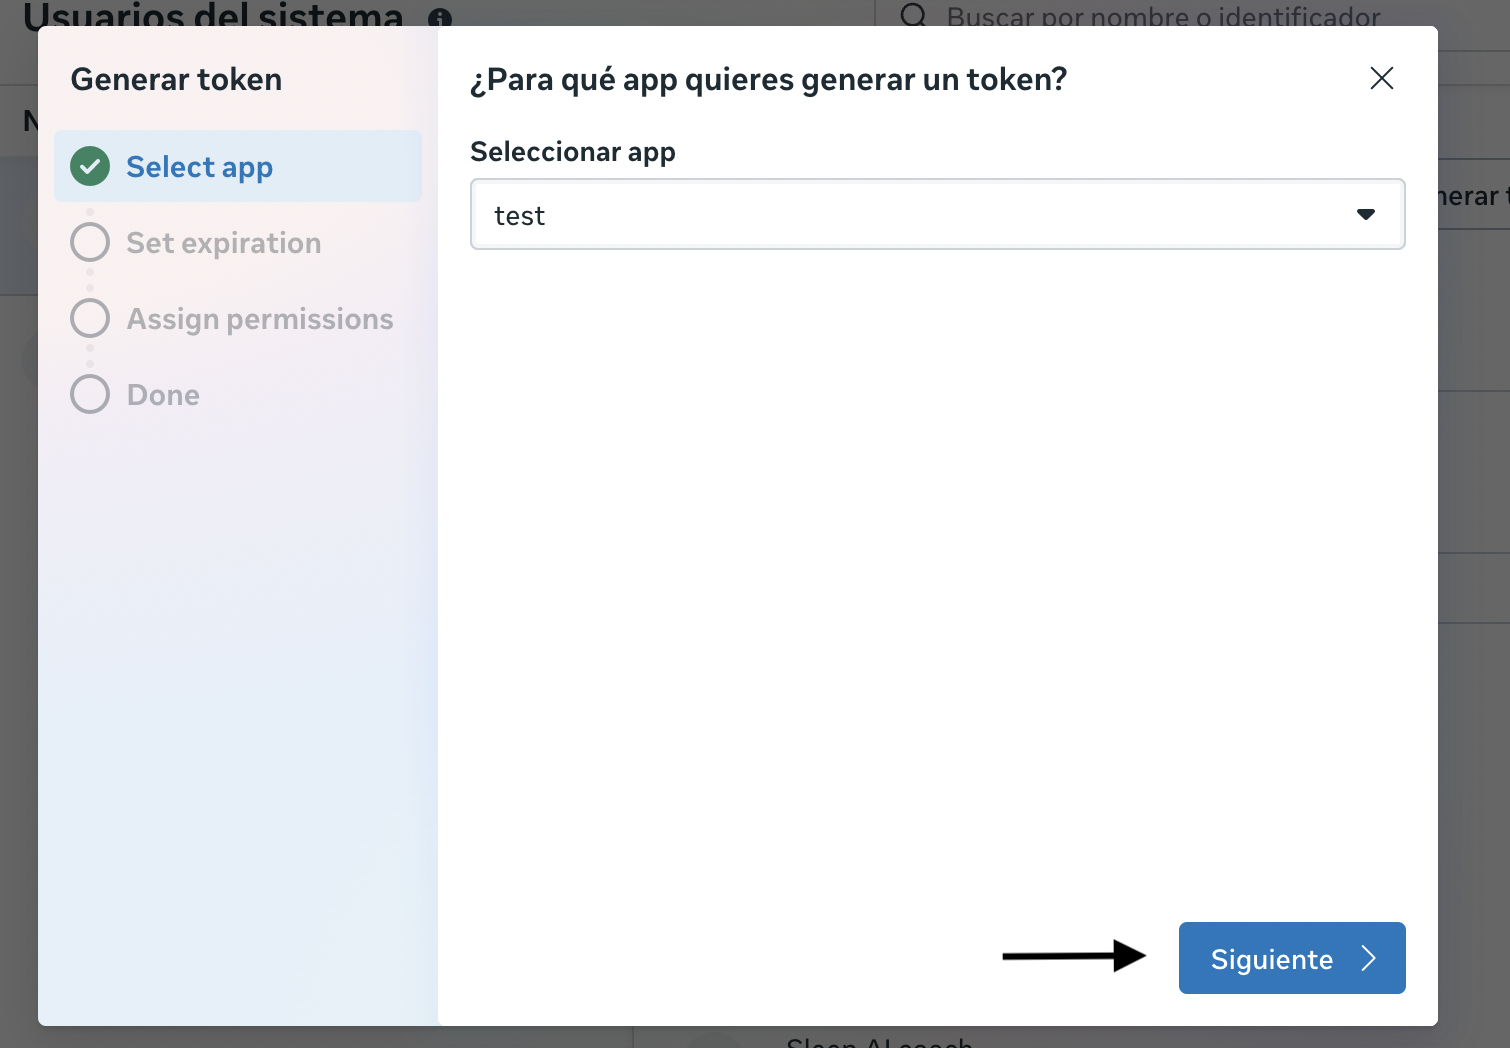
Token Configuration:
- Select application: Choose the app you created previously
- Click “Next”
- Configure expiration: Select “Never” to create a permanent token
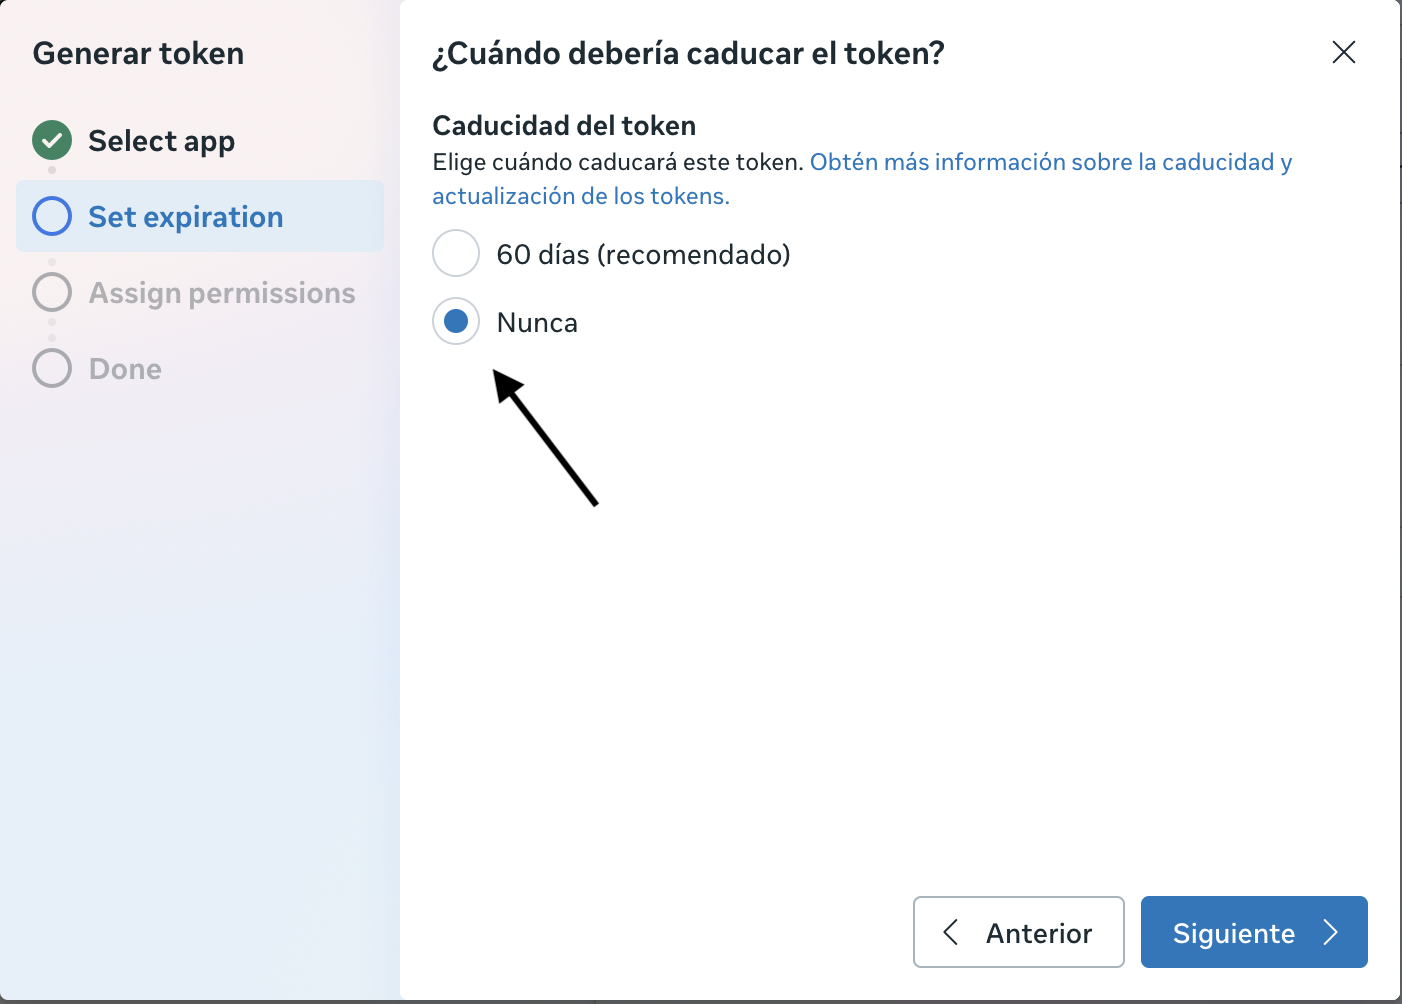
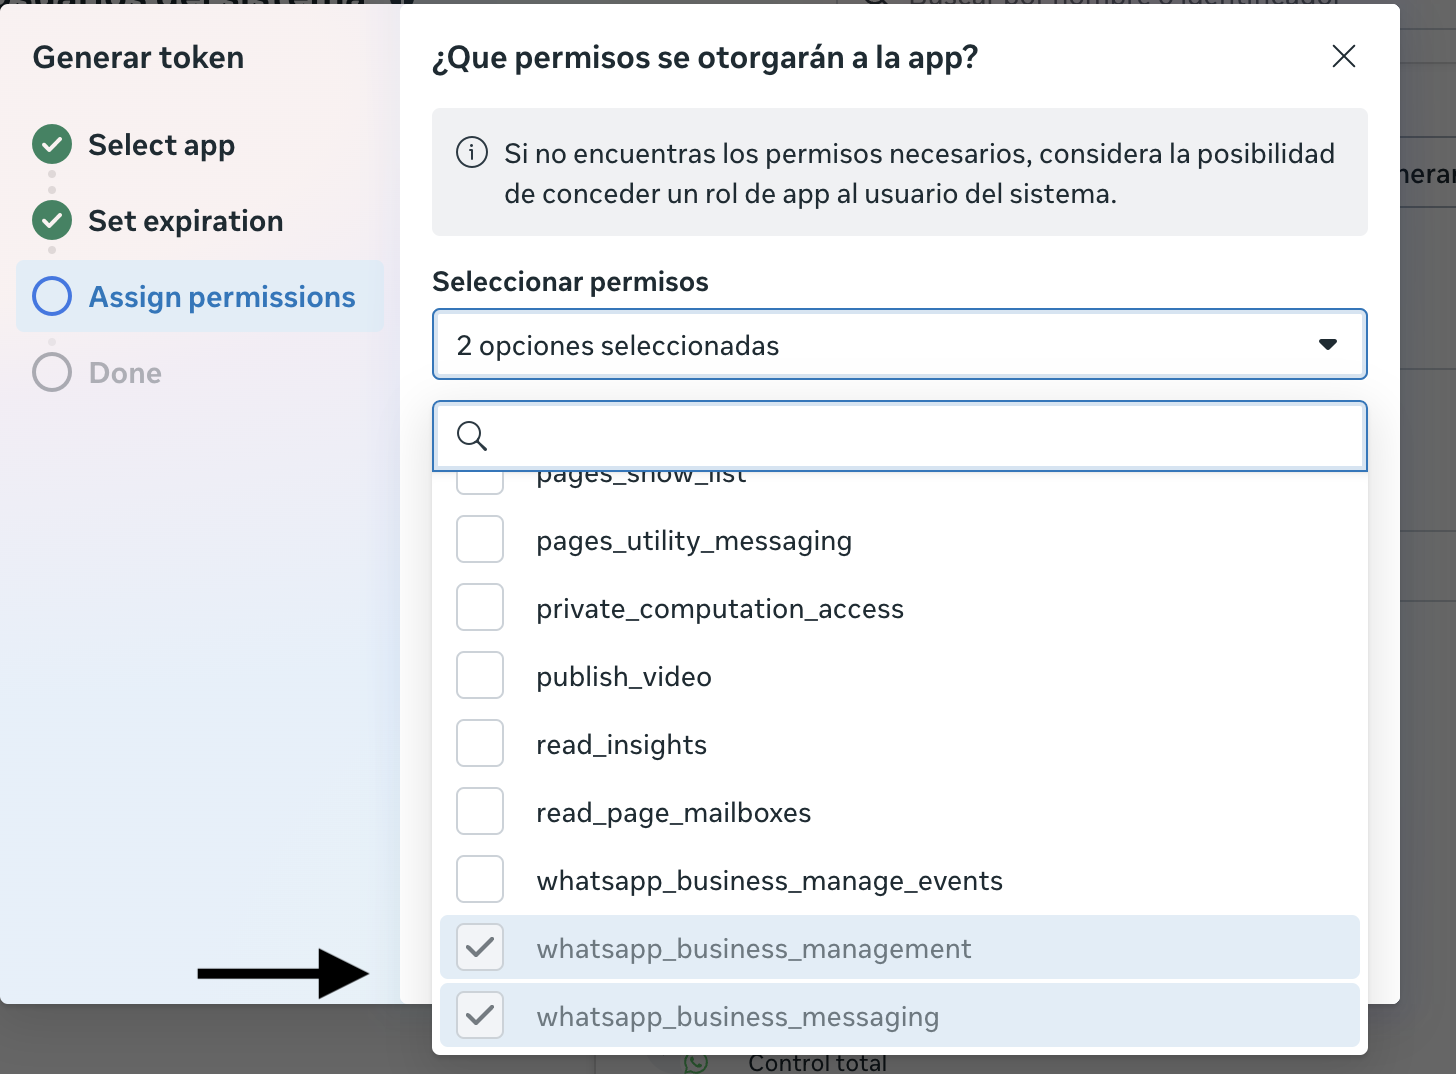
- Assign permissions: Select all necessary permissions for WhatsApp Business API
- Click “Generate token”
Congratulations! Your Permanent Token has been Generated
Once you click “Generate token”, Meta will process your request and generate your permanent WhatsApp Business API token.Final Steps:
- Copy the token: A modal window will appear with your token. Copy it completely.
- Save the token securely:
- Save it in a password manager
- Write it down in a secure place
- Configure it as an environment variable in your project
Example of how to save the token:
Important Considerations
Token Security
- Never share your permanent token publicly
- Store it in environment variables
- Use it only in your application’s backend
- Consider rotating the token periodically for security
Rate Limits
- Permanent tokens have the same limits as temporary ones
- Meta applies limits per user, application, and phone number
Next Steps
Once you have your permanent token configured:- Configure webhooks to receive messages
- Implement message sending